You Should Install & Activate “LYNX Add-ons” Plugin to use this feature with “V-blogs Creative” Theme.
AMP (Accelerated Mobile Pages) is an open-source framework designed by Google to create fast-loading mobile web pages. It prioritizes speed and user experience, offering a streamlined version of web pages for mobile users.
Enabling AMP with VBC: VBC is compatible with the “AMP plugin by AMP Project Contributors,” allowing you to utilize this feature by following these steps:
Install AMP Plugin
- Go to the Add New plugin page in your WordPress dashboard and search for “AMP.”
- Locate “AMP” by AMP Project Contributors from the search results.
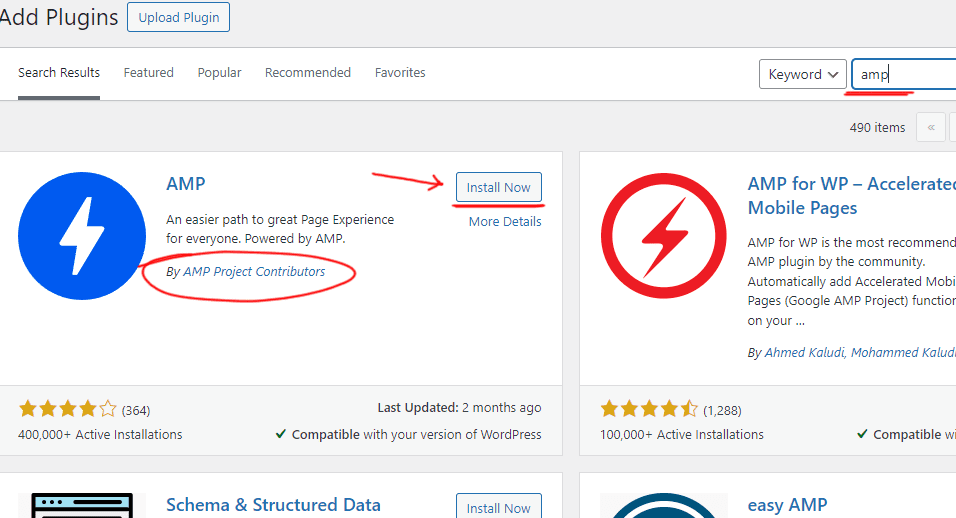
- Click on the “Install Now” button and after installation complete, click on “Activate” button to active the plugin .
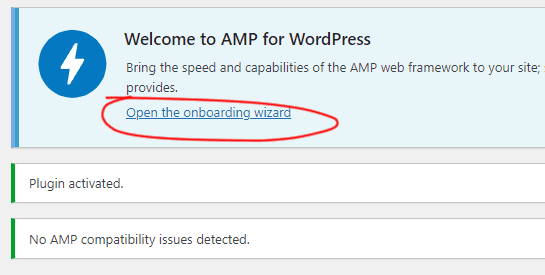
Onboarding Wizard Setup
- Click on the “Open the onboarding wizard” link in the AMP plugin settings.
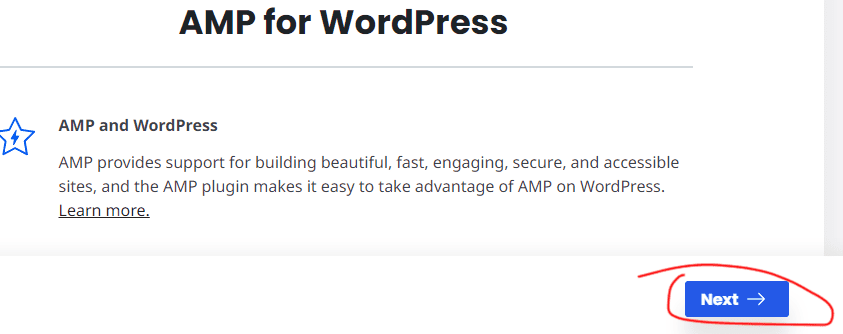
- Click on “Next” button on wizard box.
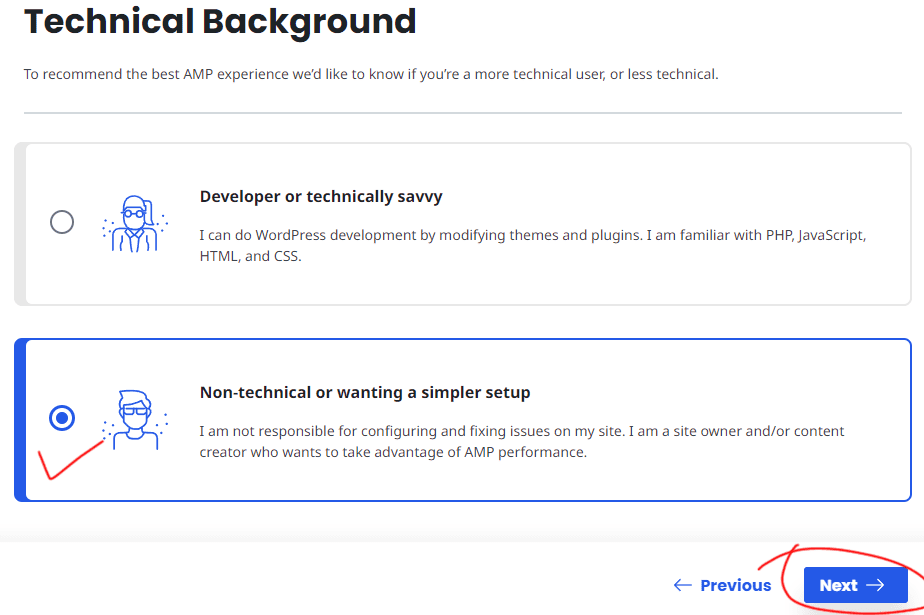
- Choose the “Non-technical or wanting a simpler setup” option if you prefer a simpler setup process.
- If you are comfortable with technical configurations, select the “Developer or technically savvy” option for more control.
- If you are comfortable with technical configurations, select the “Developer or technically savvy” option for more control.
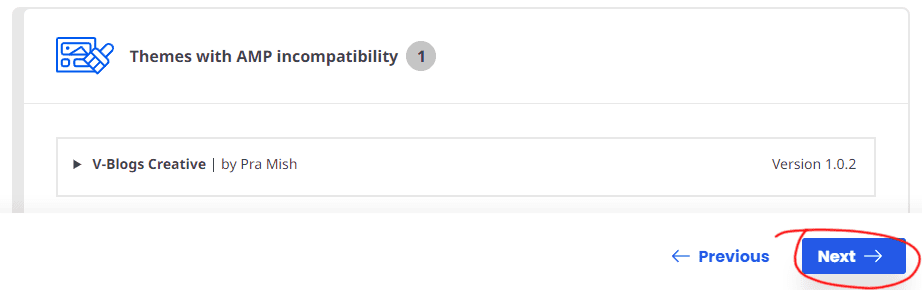
- After the site scan completes, ignore any notices and click on the “Next” button to proceed.
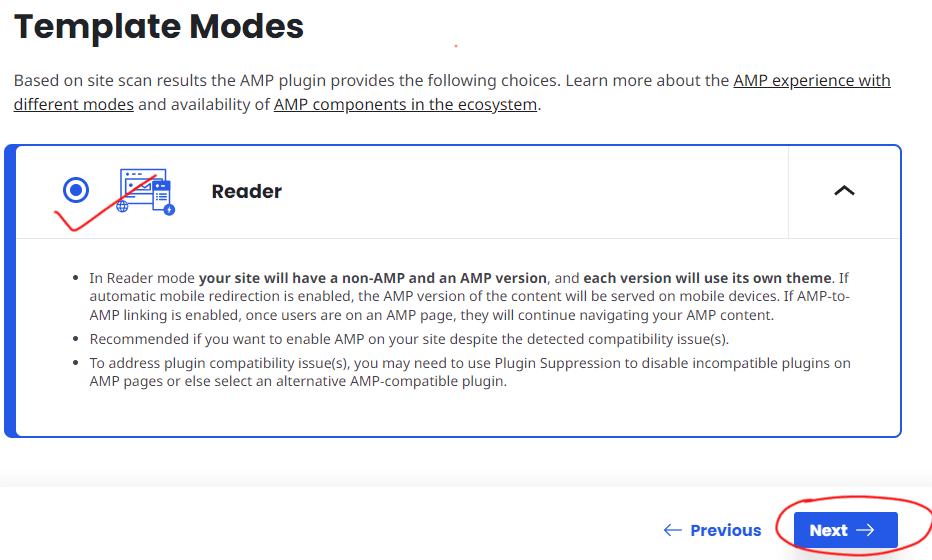
- Choose the “Reader” template mode for a clean and simple layout optimized for readability.
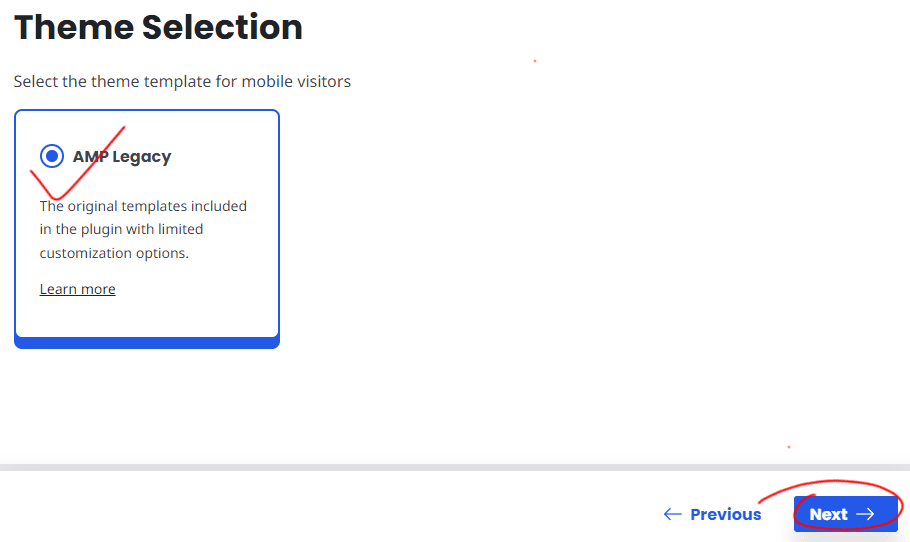
- Theme Selection:
- Select the “AMP Legacy” theme for compatibility with VBC’s design and features.
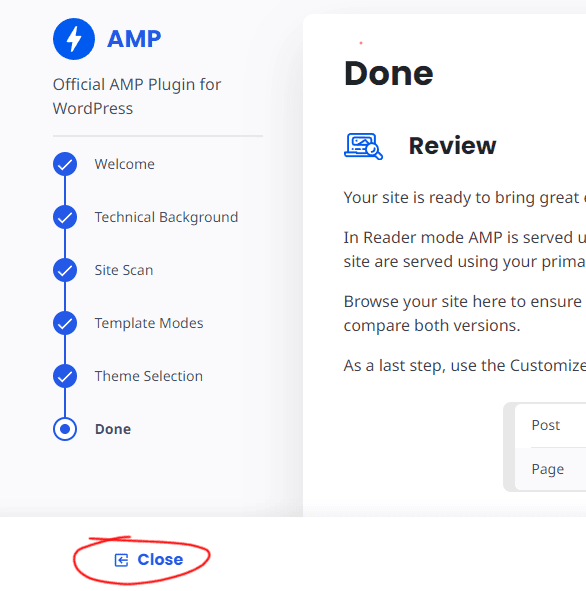
- You are done and click on Close button.
- Select the “AMP Legacy” theme for compatibility with VBC’s design and features.
Configuration AMP Settings
- Navigate to AMP Settings:
- Locate and click on the “AMP” menu at the bottom of your dashboard menu bar.
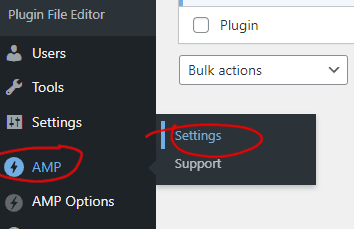
- Locate and click on the “AMP” menu at the bottom of your dashboard menu bar.
- Checking Up AMP Compatibility:
- Locate and click on “Site Scan“.
- Look for a green notification indicating that there are no issues with your site’s AMP compatibility.
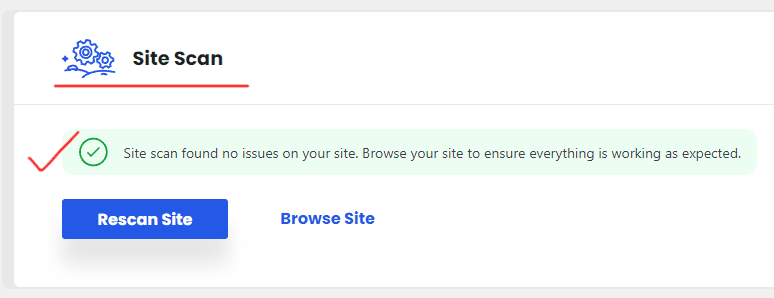
- Click on “Rescan Site” to double-check and confirm that there are no issues.
- If there are notifications indicating AMP issues and incompatibilities, immediately deactivate the plugin.
- Contact support for assistance and to report the issues.
- If Compatibility passed:
- Configure Paired URL Structure:
- Scroll down and click on “Paired URL Structure.”
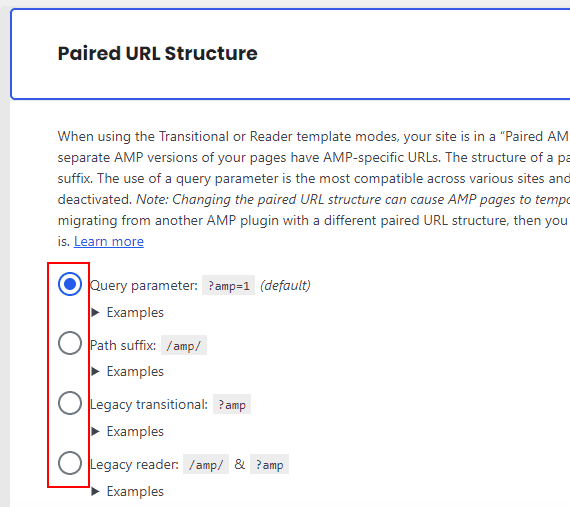
- Here, you can set up the AMP slug for your AMP pages. Choose a suitable slug for your site.
- Scroll down and click on “Paired URL Structure.”
- Further Configuration Options:
- Click on “Other” to access more configuration options for your AMP pages.
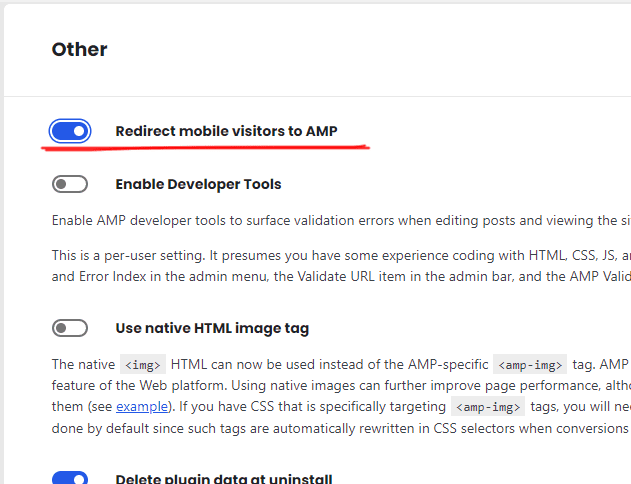
- Recommended disabling “Redirect mobile visitors to AMP“, because V-Blogs Creative theme already provides a mobile-friendly layout. This option ensures that visitors using mobile devices are automatically redirected to the AMP version of your pages.
- You can evaluate the benefits of faster loading pages on AMP compared to responsive pages and choose the option that best suits your website’s needs.
- Click on “Other” to access more configuration options for your AMP pages.
- Save Settings:
- Click on “Save” to save your configuration settings.
Configuration AMP Options
- Navigate to AMP Settings:
- Navigate the “AMP Options” menu at the bottom of your dashboard menu bar and click on “Settings” submenu.
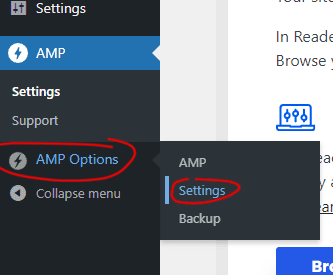
- Navigate the “AMP Options” menu at the bottom of your dashboard menu bar and click on “Settings” submenu.
- Back to Top Button:
- Enable or disable the “Back to Top” button using the toggle switch.
- Google Analytics:
- Toggle the Google Analytics switch to enable or disable tracking.
- Insert your Google Analytics Tracking ID in the provided field.
- AMP Navigation:
- Toggle the AMP Menu switch to enable or disable the AMP menu.
- Select an existing menu from the dropdown if you’ve already created one for AMP. If not, create a new menu.
- Social Share Buttons:
- Check the box to enable social share buttons based on your preferences.
Configure these options according to your preferences and click on “Save” to apply the changes.