Making Your Site Look Like the Demo
One of the enticing features of V-Blogs Creative Theme is the ability to replicate the stunning demo appearance on your own website effortlessly. Follow these steps to import the demo content:
Demos content should be installed in a fresh installation of WordPress.
Some images are copyrighted. We do not have the right to include some images of demos in the content due to copyright issues, so images will look different from the demo.
Step 1: Initiate Demo Impor
Before initiating the import process, navigate to ‘V-Blogs Creative‘ -> ‘Templates‘ in your WordPress dashboard. Pick a template that aligns with your website vision.
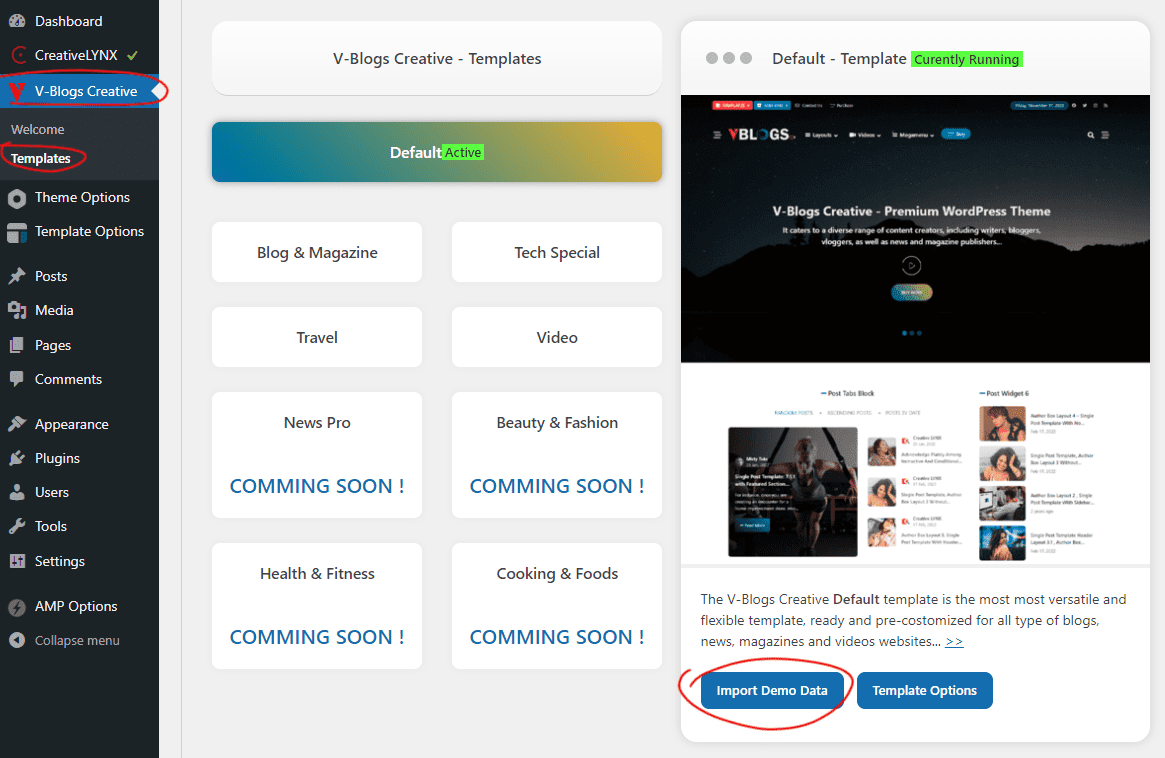
After selecting a template, you’ll notice an “Import Demo Data” button. Click on it, and you will be redirected to the demo import page.
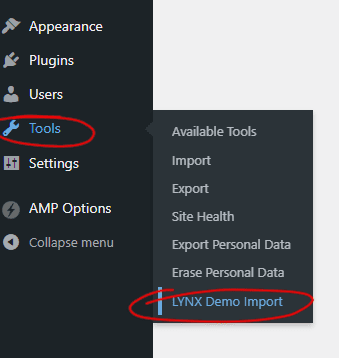
Or,
Navigate to ‘Tools‘ -> ‘LYNX Demo Import‘ in your WordPress dashboard.
Step 3: Follow On-Screen Instructions
On the demo import page, follow the on-screen instructions to customize the import settings as per your preferences. You may have options to select specific demo components, such as pages, posts, images, and more.
Step 4: Begin Import Process
Once your preferences are set, commence the import process. Depending on your chosen demo and internet speed, this might take a few minutes.
Note:
- Content Customization: While the demo import establishes a foundation, you can further customize content, images, and layouts to suit your unique requirements.
- Flexibility: V-Blogs Creative Theme offers flexibility even after demo import, allowing you to modify and personalize your website content seamlessly.
Now that your site looks like the demo, you can proceed to further customize content, adjust layouts, and explore additional theme features to create a unique and engaging online presence. Enjoy the journey with V-Blogs Creative!