After creating and customizing your ads in the LYNX ADS settings, you’ll need to apply them to your web pages. This guide will walk you through the process of applying ads using the shortcode.
Apply Ads from Copied Shortcode
- Navigate to “LYNX ADS” Menu: Go to your WordPress dashboard and click on the “LYNX ADS” menu.
- Access All Ads: click on the “All ADs” submenu to view a list of all the ads you’ve created.
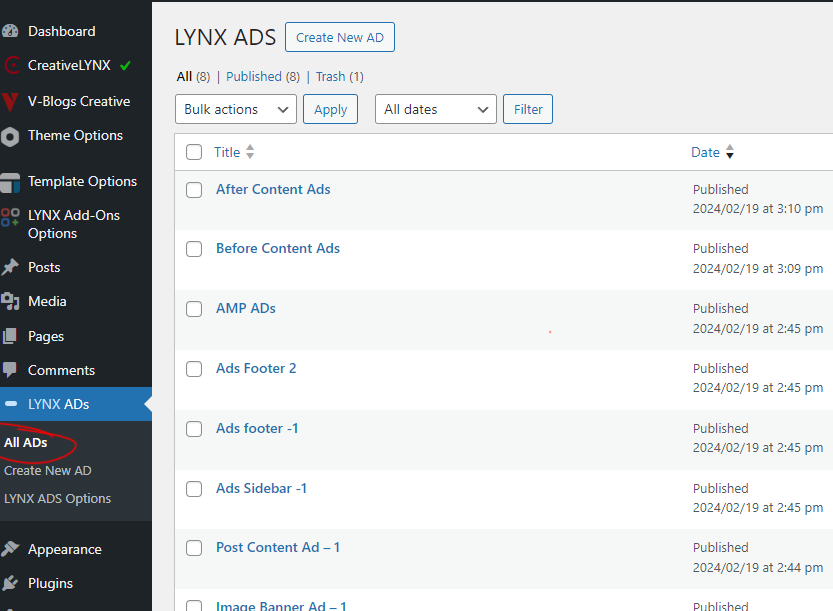
- Choose an Ad: Click on the ad you want to apply. This will take you to the edit page for that ad.
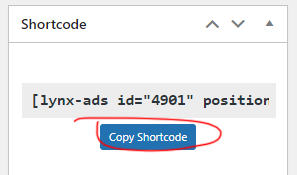
- Copy the Shortcode: Look for the “Shortcode” field at the top right corner of the edit page. Click on the “Copy Shortcode” button to copy the ad’s shortcode.
Manual Ads Apply Inside Posts and Pages:
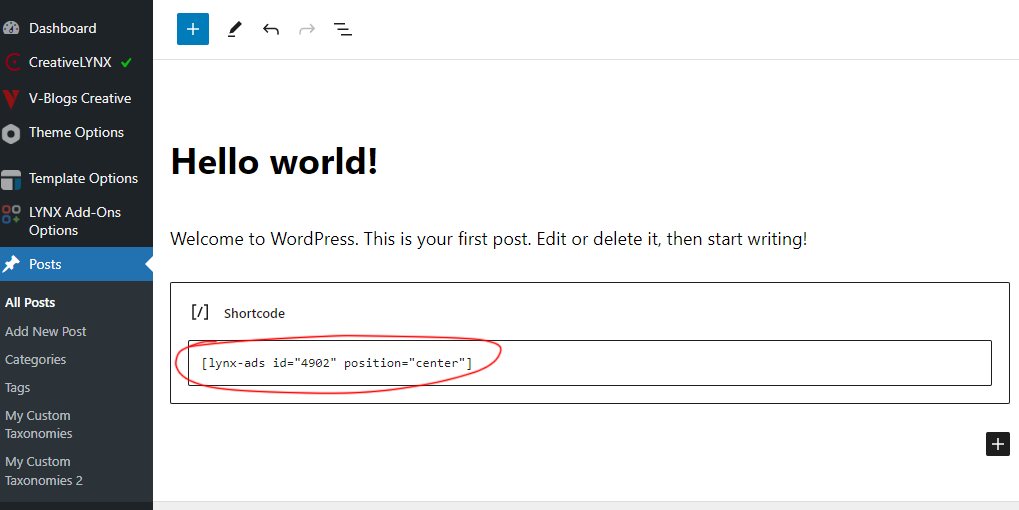
- Paste the Shortcode: Go to the post or page where you want to add the ad. Paste the copied shortcode into the content editor at the desired location.
PHP Ads Application Anywhere in the Page:
- Use the PHP Code: To apply the ad anywhere in the page using PHP, use the following code:
<?php echo do_shortcode('[lynx-ads id="YOUR_AD_ID" position="YOUR_POSITION"]'); ?>
Replace YOUR_AD_ID with the ID of your ad and YOUR_POSITION with the desired position (center, left, or right).- Update the Ads ID: Manually update the ad ID in the shortcode to match the ID of the ad you want to apply.
- Update the Ads Position: Set the position for the ad (
center,left, orright) based on your layout requirements.
Browse Ads Shortcode from Block Editor to The Post Content
There is a different documentation available on inserting LYNX Add-ons item‘s shortcodes inside post content from the Editor block and shortcode button. Click here to access the documentation and learn about applying ads from the block (Gutenberg) or classic editor to the post content.
Apply Ads to Sidebars/Footers through widgets
There is different documentation available on inserting LYNX Add-ons items in the widgets. Click here to access the documentation and learn about applying ads to sidebars and footers through the widget areas.
Selecting Ads in Template Options
If you are using V-Blogs Creative theme, you don’t need to apply ads manually anymore. To select and apply ads to specific sections of your website, such as the homepage, archive page, after header, or before footer, you can customize the ads settings from Template Options. Properly customizing the ads settings for each page section in Template Options eliminates the need to manually copy and paste shortcodes.
Here’s how you can select ads in Template Options:
- Choose ADS:
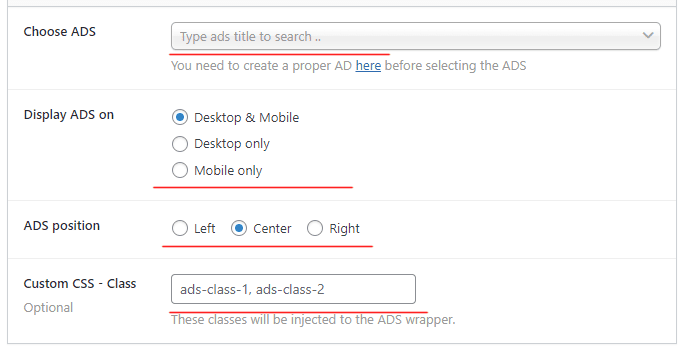
- In this field, type the title of the ad you created for the specific page. As you type, the ads titles will appear in a drop-down list. Select the appropriate ad title from the list.
- Display ADS on:
- Select one of the following options:
- Desktop & Mobile: Display the ads on both desktop and mobile devices.
- Desktop only: Display the ads on desktop devices only.
- Mobile only: Display the ads on mobile devices only.
- Select one of the following options:
- Ads position:
- Choose the position for your ads placement, such as left side, center, or right side (applicable if your ads have a certain width).
- Custom CSS – Class:
- If you need to add custom CSS classes, enter them in the field separated by commas. These classes will be injected into the ADS wrapper, allowing you to apply custom styles to the ads.
Finding ADS Settings in Template Options
Accessing Template Options:
- Go to your WordPress dashboard and locate “Template Options” in the menu. Click on it to open the Template Options page.
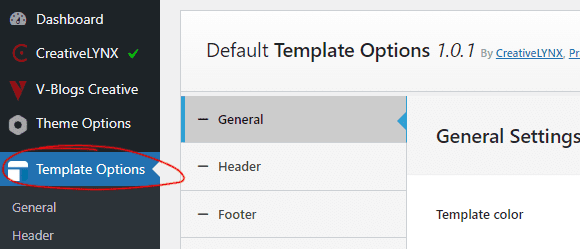
Header Ads Settings:
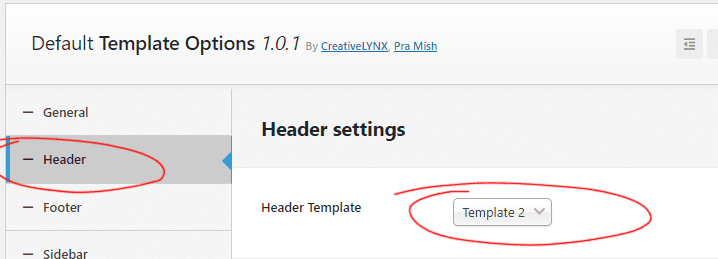
- If you want to configure ads for the header section of your website, first, click on the “Header” tab in the Template Options page.
- Next, select “Header Template” as “Template 2” from the available options.
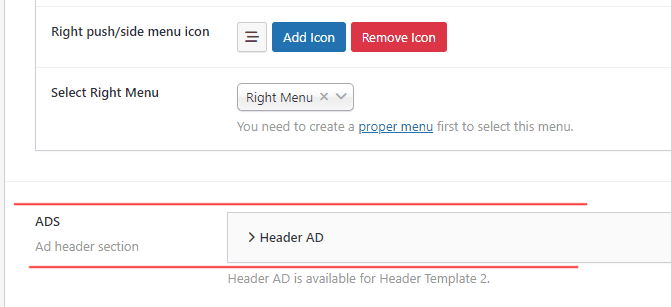
- Scroll down to the bottom of the page to find the ADS field dedicated to customizing header ads. Here, you can add and configure the header ads settings.
Home Page Ads Settings:
- Accessing Home Page Ads Settings:
- Go to the Template Options page in your WordPress dashboard.
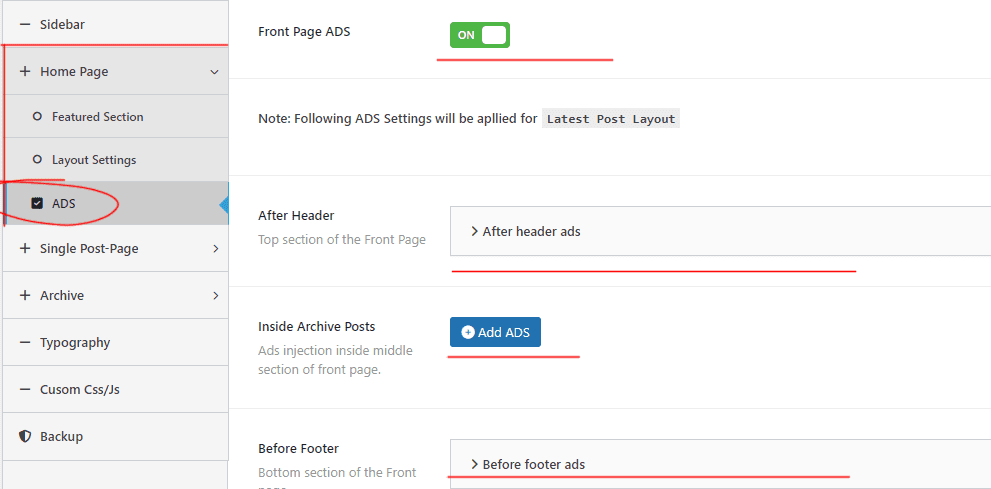
- Click on the “+Home Page” tab to access the home page settings.
- Navigating to ADS Settings:
- In the submenu at the bottom of the “+Home Page” tab, locate and click on the “ADS” submenu. This action opens the “Home Page – ADS Settings” page.
- Customizing Home Page Ads:
- On the “Home Page – ADS Settings” page, you can customize the settings for your home page ads as per your requirements.
Note: If you have set your home page as a “Custom Layout” in the “Layout Settings” page, you will find only an option to toggle ON/OFF ads in the “ADS” submenu. For other ads settings and customization, you will need to access the Blocks settings. click here for ADS block docs.
Single Post-Page Ads Settings:
- Accessing Single Post-Page Ads Settings:
- Go to the Template Options page in your WordPress dashboard.
- Click on the “+Single Post-Page” tab to access the single post-page settings.
- Inside Post-Page Content Ads Settings:
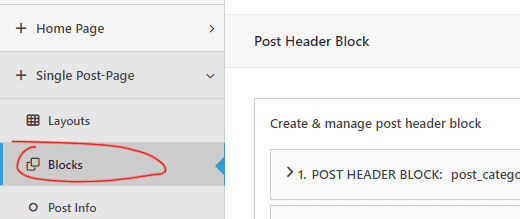
- Navigate to the “Blocks” submenu of the “+Single Post-Page” tabs menu.
- In the “Post Header Block“:
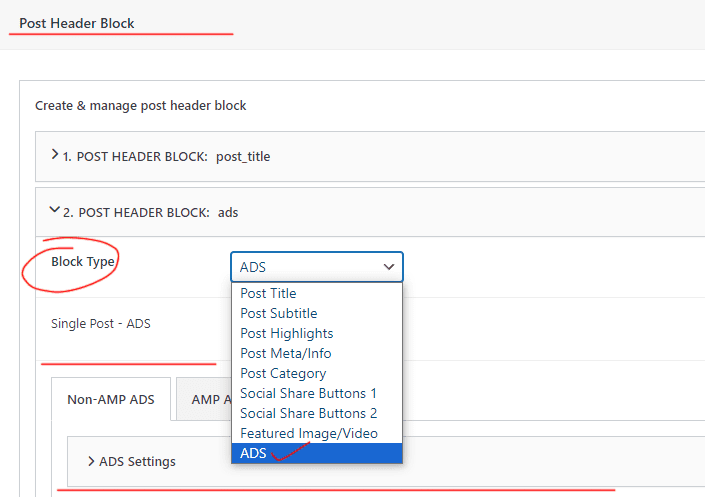
- Click on the “Add Block” button.
- Select “ADS” in the Block Type field to configure your ads settings for the post header section of the single post page.
- In the “Post Content Block“:
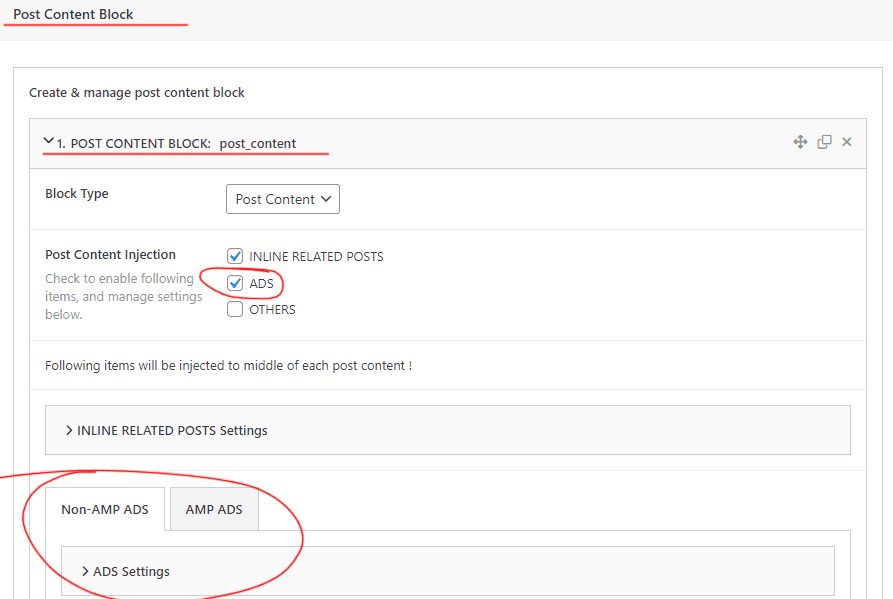
- Click on “POST CONTENT BLOCK: post_content”.
- Check “ADS” in the “Post Content Injection” field to reveal your ads settings fields.
- In the “Post Footer Block“:
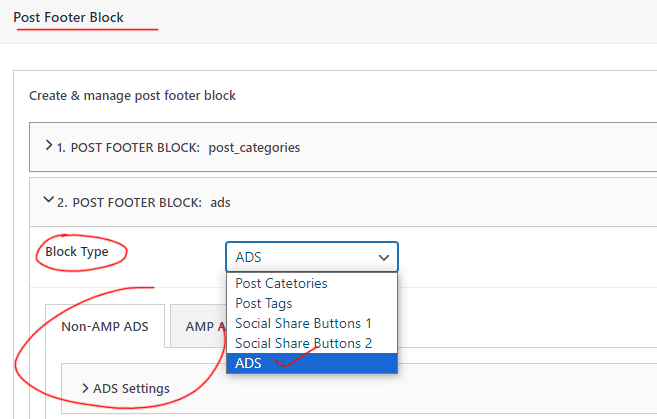
- Click on the “Add Block” button.
- Select “ADS” in the Block Type field to configure your ads settings for the post footer section of the single post page.
- In the “After Post Content Block“:
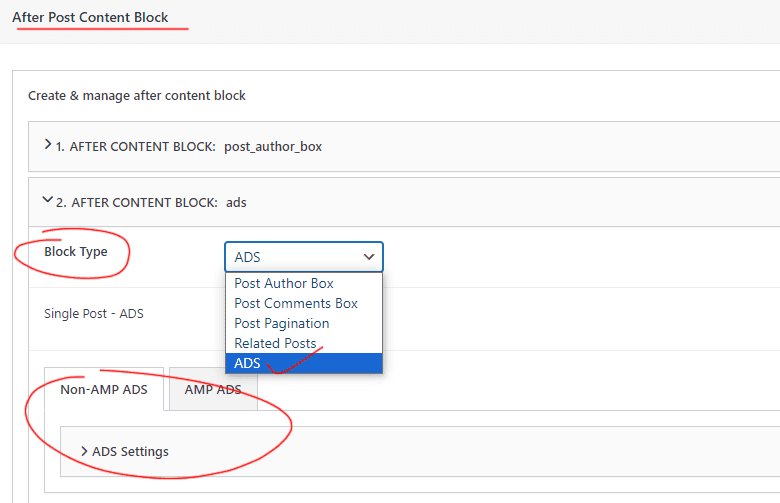
- Click on the “Add Block” button.
- Select “ADS” in the Block Type field to configure your ads settings for the section after the post content.
- After Header/Before Footer Ads Settings:
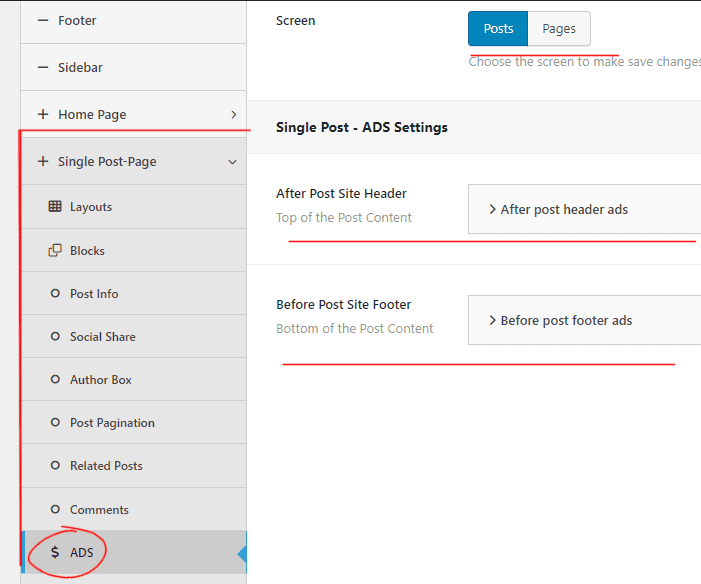
- Go to the “ADS” submenu of the “+Single Post-Page” tabs menu.
- The “Single Post-Page – ADS Settings” page will open, allowing you to customize the ads settings for the after header and before footer sections.
Archive Ads Settings:
Accessing Archive Ads Settings: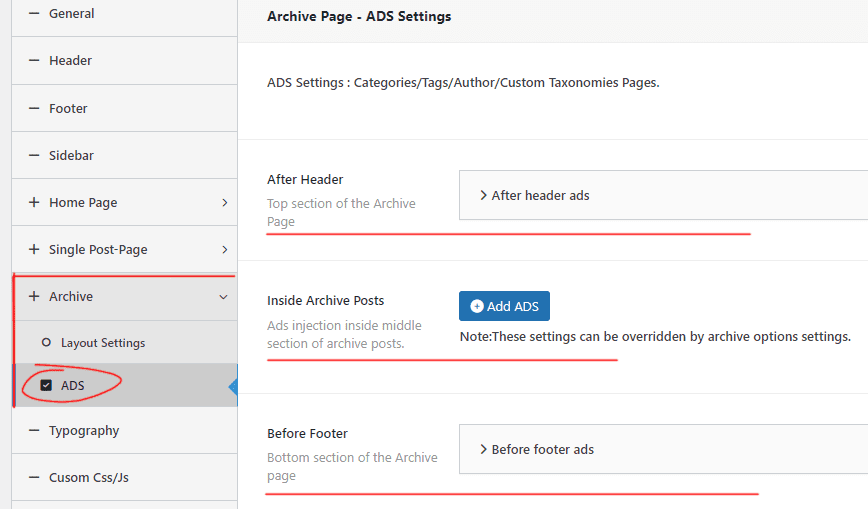
- Go to the Template Options page in your WordPress dashboard.
- Click on the “+Archive” tab to access the archive settings.
- Go to the “ADS” submenu of the “+Archive tabs menu.
- The “Archive – ADS Settings” page will open allowing you to customize the ads settings for the after header, inside archive posts, and before footer sections.
Video Pages Ads Settings:
To configure ads settings for your video pages, follow these steps:
- Access Video Options:
- Go to the “LYNX Videos” menu in your dashboard.
- Click on “Video Options“.
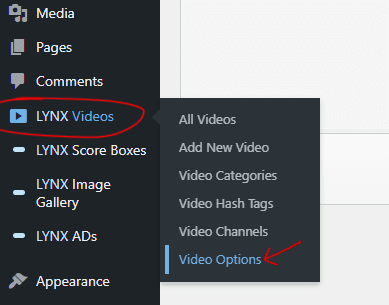
- Navigate to Page Settings:
- In the “Video Options” page, click on the “Page Settings” tab.
- Click on the “ADS” submenu in the bottom line of the “Page Settings” tab menu.
- Customize Ads Settings:
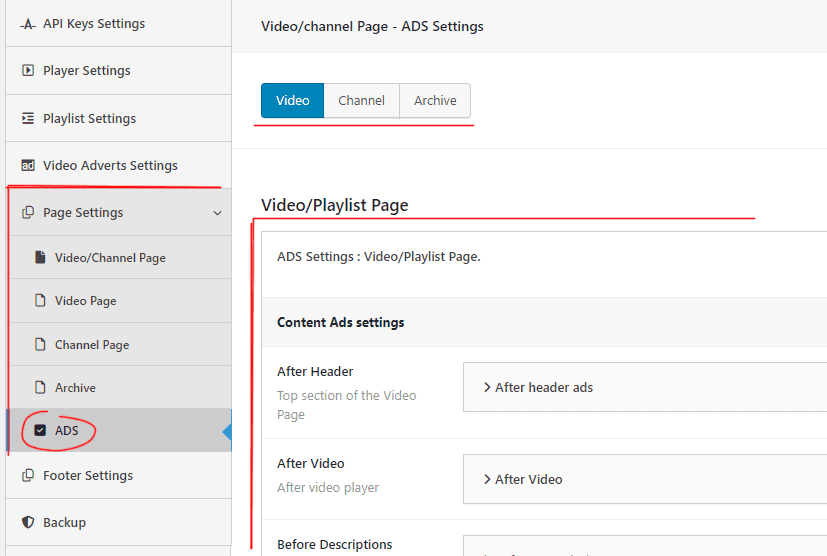
- In the “Video/channel Page – ADS Settings” page, you can fully customize the ads and their settings for your videos and video channel pages. Adjust the settings according to your preferences.

