HTML tables are used to organize and display data in rows and columns. With LYNX Tables, you can create responsive HTML tables for your website.
You need to install & activate LYNX Add-ons plugin, since this is a part of the plugin !
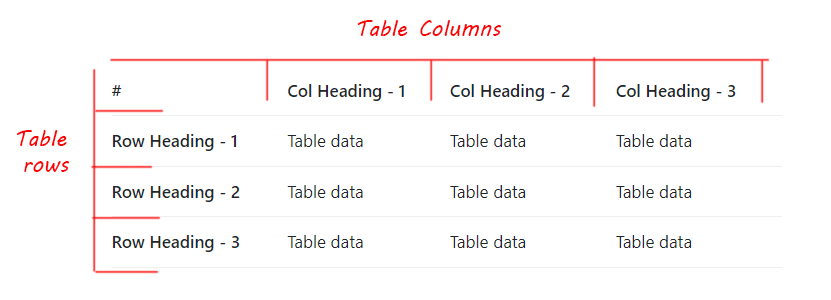
Understanding Table Structure
- Row Heading: The first row of the table, containing headings for each column.
- Column Heading: The topmost cell in each column, indicating the content below it.
- Table Rows: The individual rows of data within the table.
- Table Columns: The vertical sections of the table, aligned under each column heading.
Creating HTML Table with LYNX Add-ons Plugin
- Go to “LYNX Add-ons Options” menu in your WordPress dashboard.
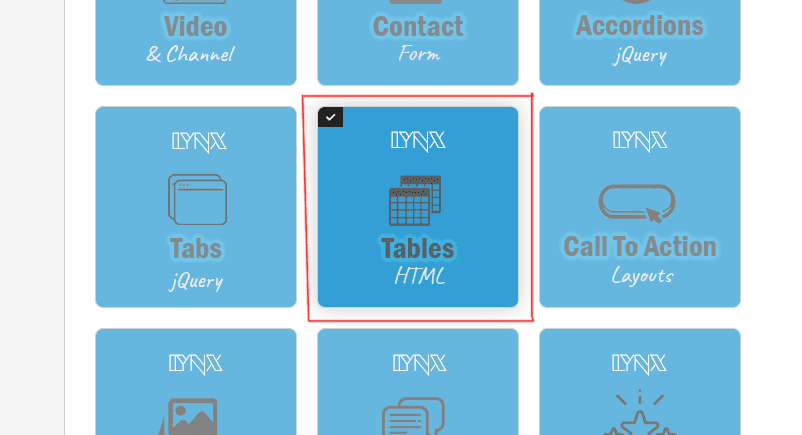
- Enable “LYNX Tables” to activate the feature.
- Save your changes and refresh the page.
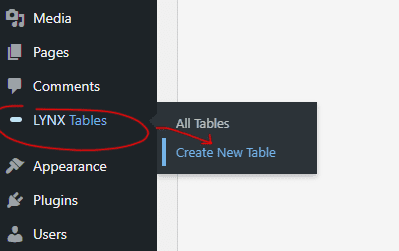
- You will now see the “LYNX Tables” menu item in the dashboard menu.
Creating a New Table
- Hover over the “LYNX Tables” menu and click on “Create New Table” submenu.
- The “Create New Table” page will open.
In Create New Table Page
- Add a title to identify your table.
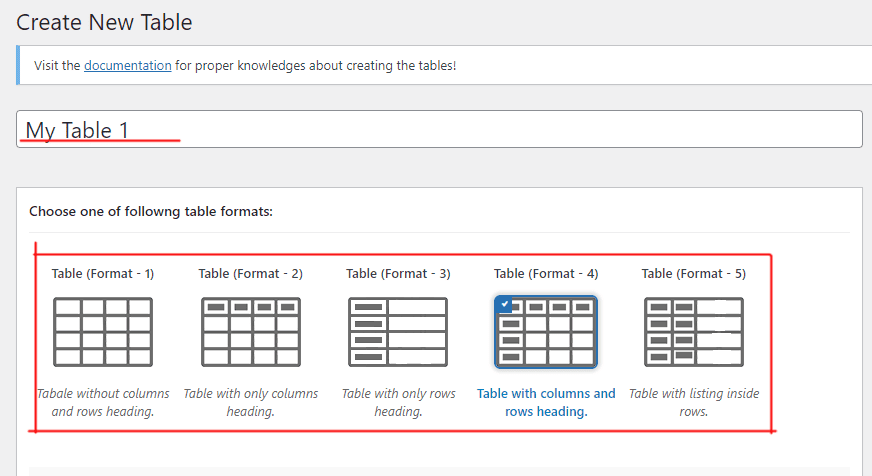
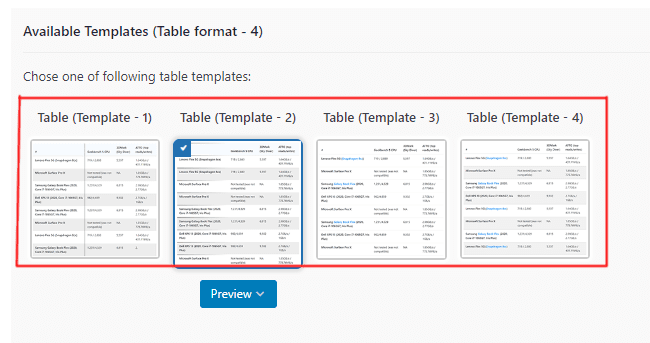
- Select a table format from the available options.
- Choose a pre-built table layout from the provided templates.
- Specify the number of rows and columns for your table.
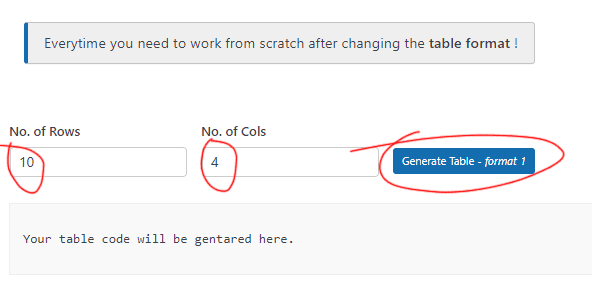
- Click on “Create Table Format.”
- The table code in HTML format will be generated.

- Copy the generated HTML code
- WP editor field will be appeared just below generated code field.
- In the editor, find the “Visual” and “Text” mode buttons in the top right corner.
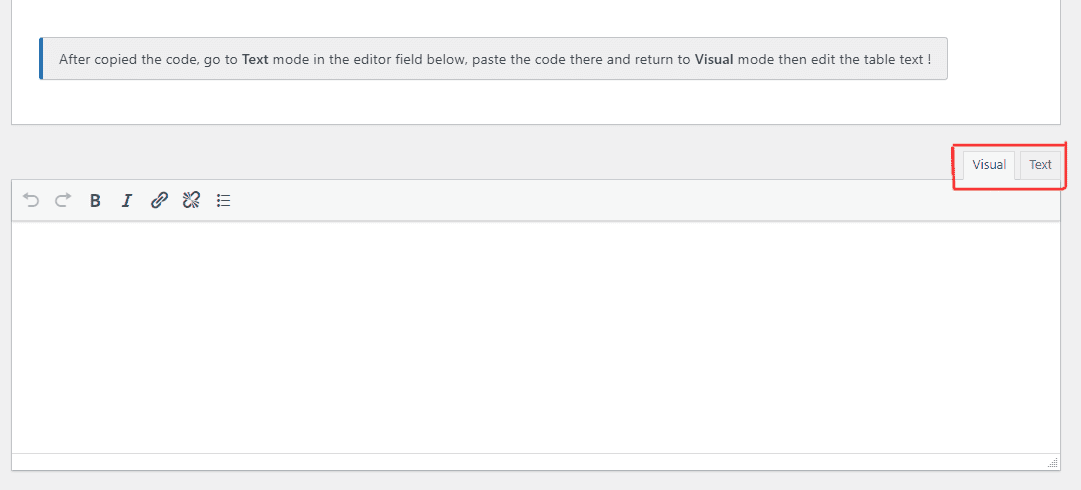
- Click on the “Text” mode button to switch to the text editor.

- Paste the copied HTML table code into the text editor field.
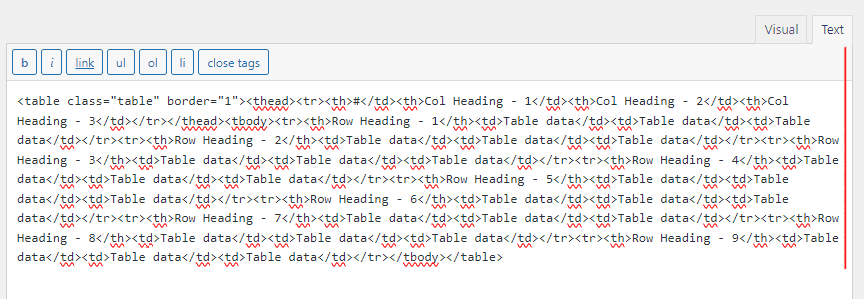
- After pasting the code, click on the “Visual” mode button to switch back to the visual editor.
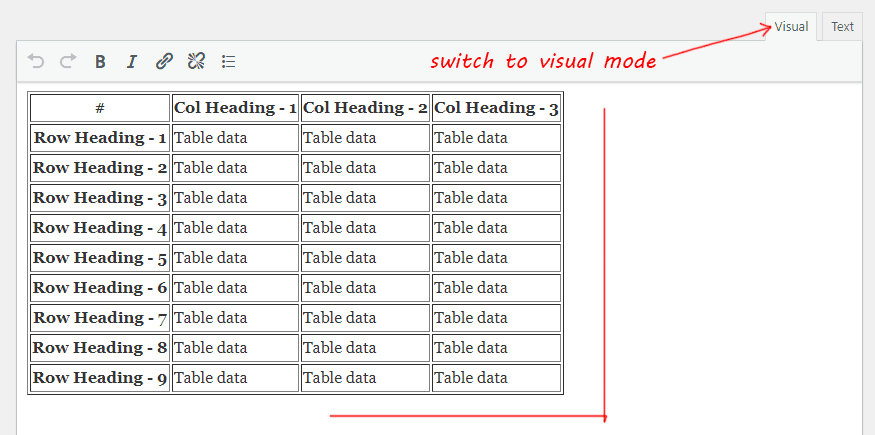
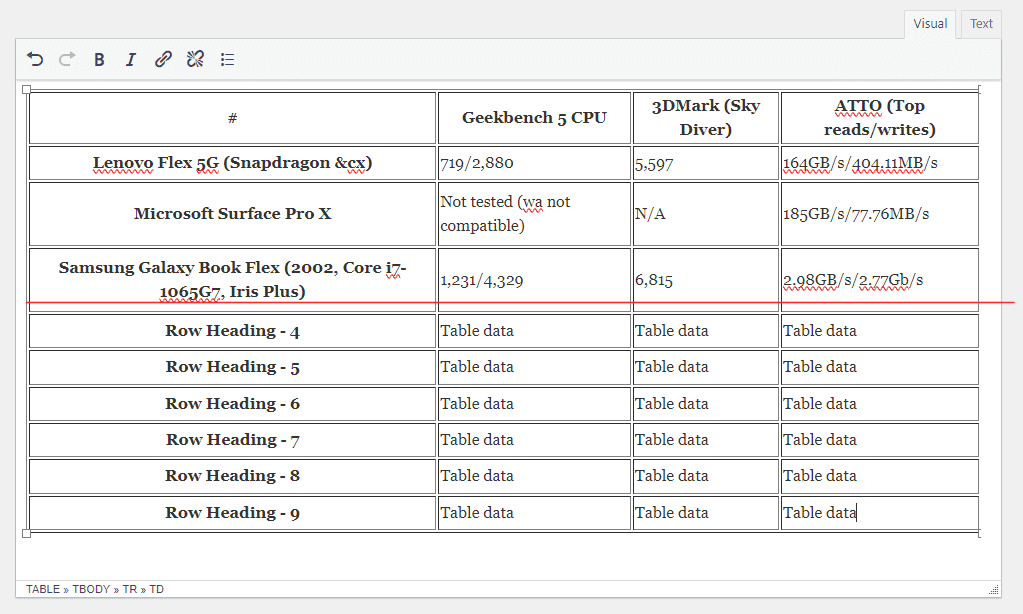
- Expand the table format to insert table text
- Replace the “Table- Row/Col Heading” and “Table data” text with your own into the table cell.
- Click on the “Publish” button to save your table.
- You’ll find a “Shortcode” field in top right corner of the page above publish button.
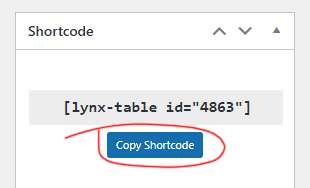
- Copy the Shortcode provided for your table.
- Paste the shortcode into your posts or pages where you want the table to appear.
Inserting table with post editor block and widget areas, just follow this documentation here.
Table Format 3 – Template 4 & 5 and Table Format 5
Creating the Table Format 3 – Template 4/5 and Table Format 5, follow the following steps:
Table Format 3 – Template 4 & 5
Understanding the table format: inspect this image
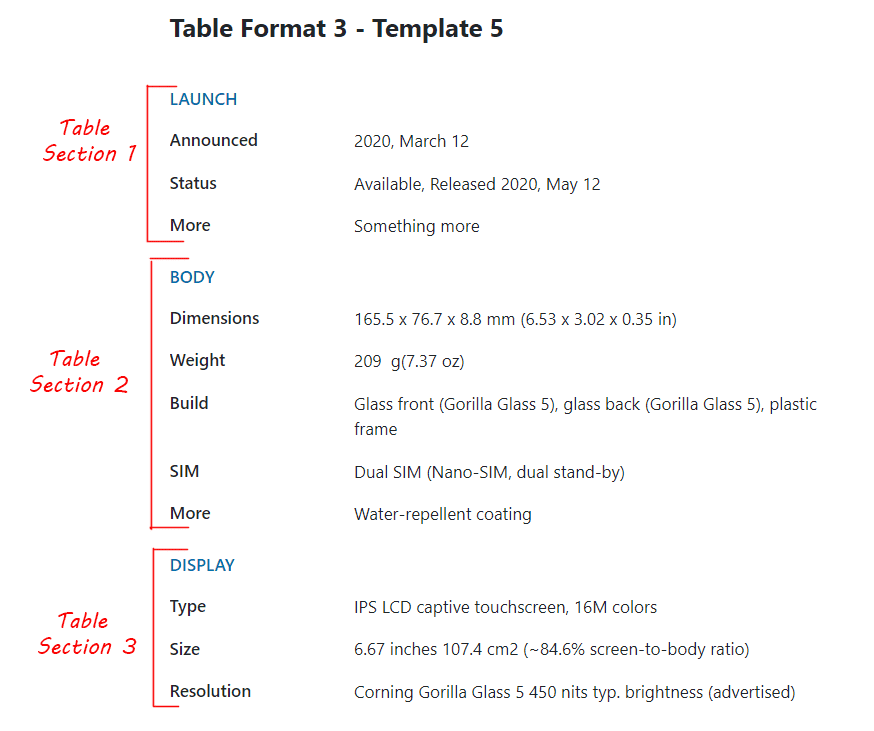
- Creating Section 1:
- Select Table Format 3 and Template 4 or 5.
- Generate the table with just 2 columns and the required rows for Section 1.
- Copy the generated code.
- Switch to the text mode in your editor and paste the copied code.

- Return to visual mode and expand the table to insert table data in the cells.
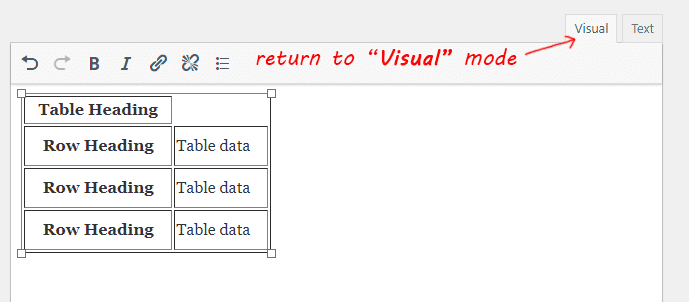
- Replace the “Table Heading” placeholder text with your actual section title.
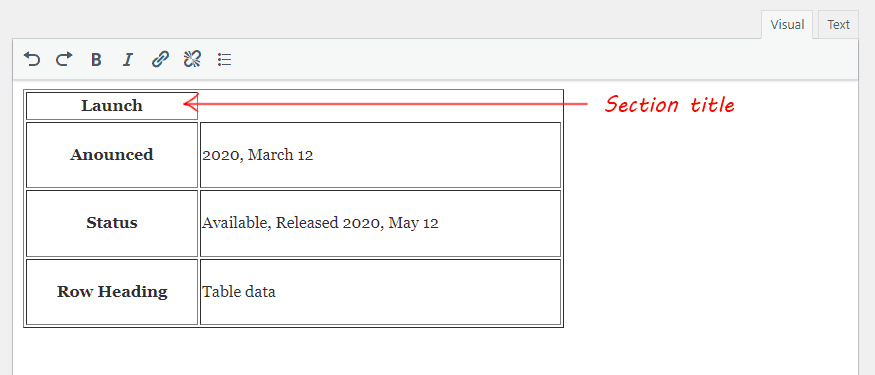
- Replace other “Row Heading” and “Table data” text with your own content.
- Adding Additional Sections:
- To add another section, repeat the process above.
- Generate a new table with 2 columns and the required rows for the new section.
- Copy the generated code.
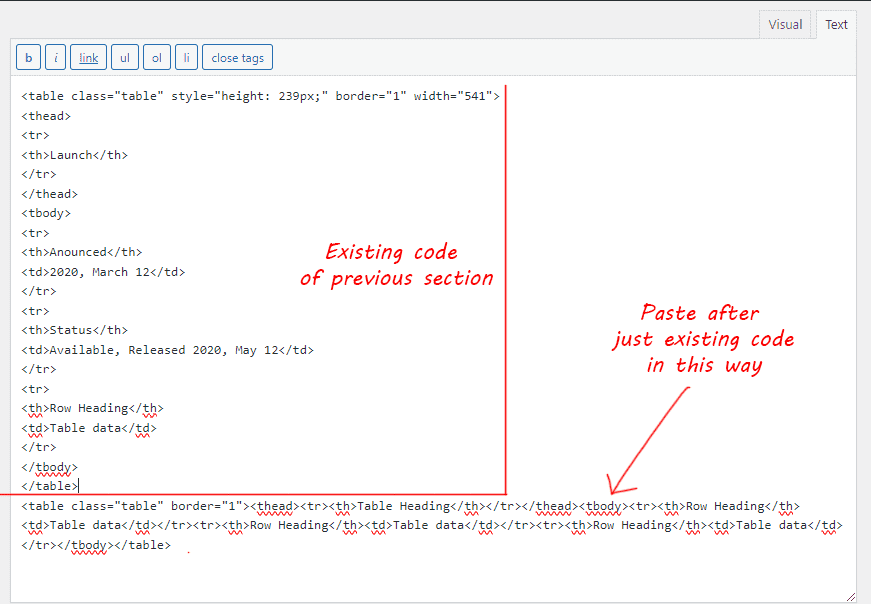
- In the text mode of your editor, paste the copied code just after the previous section’s code, at the bottom line of the existing code.
- Return to visual mode, expand the table, and insert the required text.
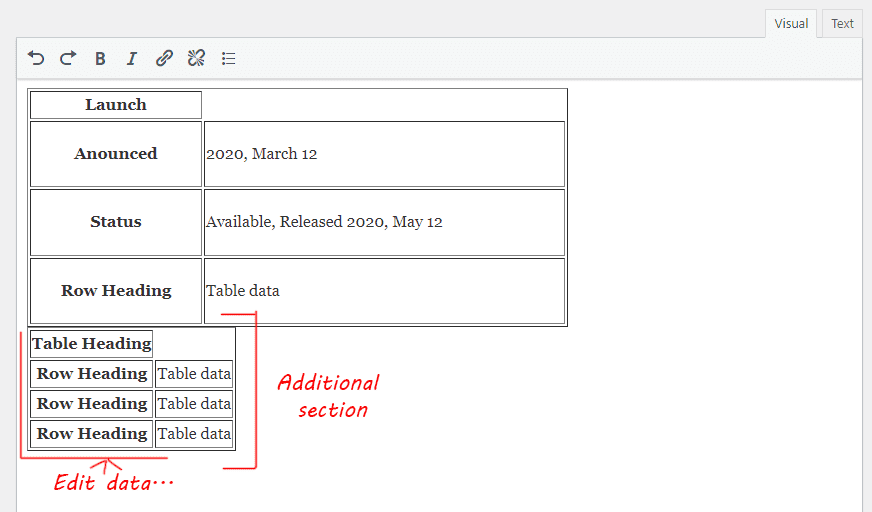
- Repeat this process for each additional section you want to add.
Table Format 5 – Template 1
Understanding the table format: inspect this image
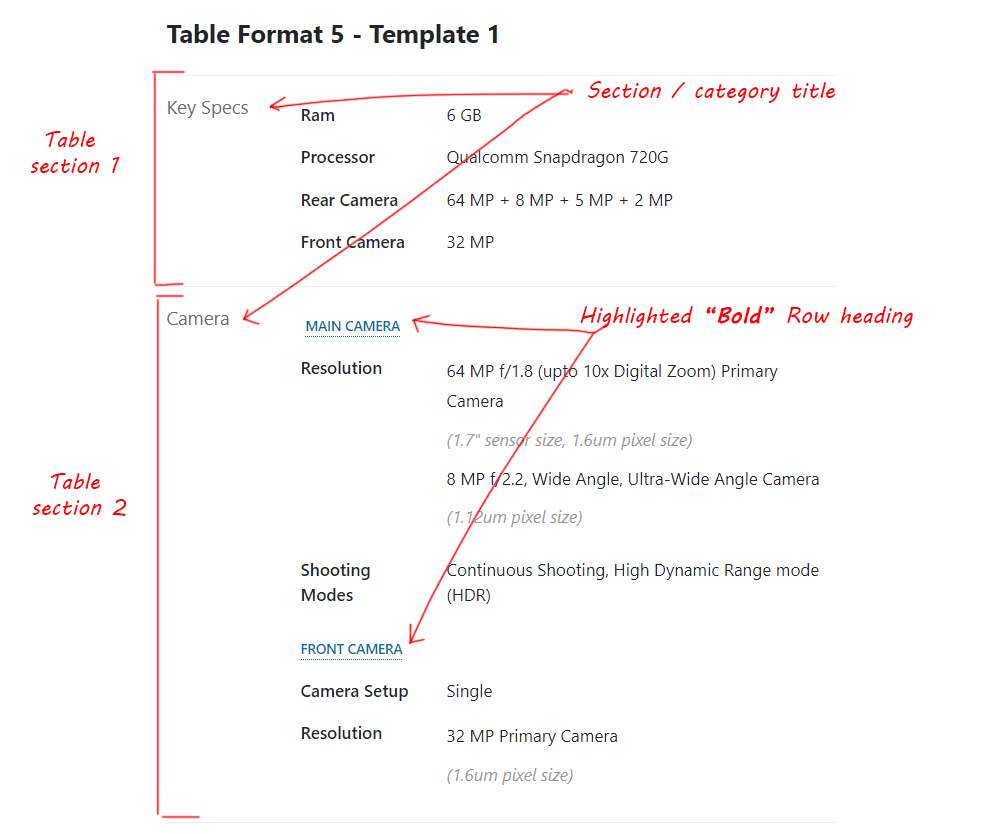
Before starting create this table format, please read the instructions and the article above to get better understanding about generating table rows and columns, copying and pasting the generated code in editor field in the details.
Creating Section 1:
- Select Table Format 5 and Template 1
- Generate the table with just 2 columns (set as default) and the required rows for Section 1.
- Copy the generated code.
- Switch to the text mode in your editor and paste the copied code.

- Return to visual mode and expand the table to insert table data in the cells.
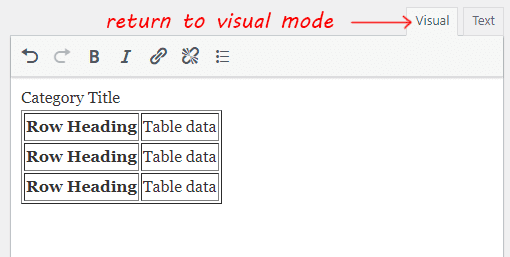
- Replace the “Category Title” placeholder text to your table section/category title
- Replace other “Row Heading” and “Table data” texts with your table content
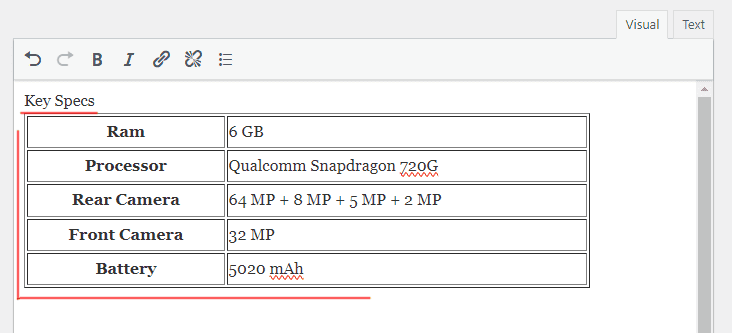
Adding Additional Sections:
- To add another section, repeat the process above.
- Generate a new table with 2 columns and the required rows for the new section.
- Copy the generated code.
- In the text mode of your editor, paste the copied code just after the previous section’s code, at the bottom line of the existing code.
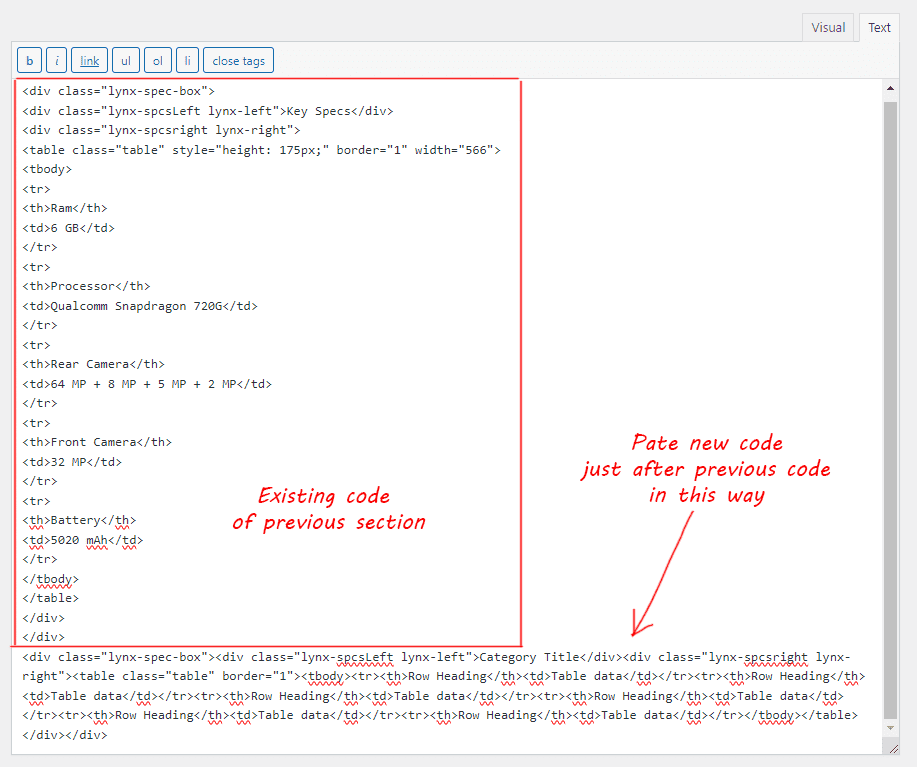
- Return to visual mode, expand the table, and insert the required text.

- Add your table data as your need.
- Adding highlighted “Bold” Row heading:
- Click on or select the top row heading text.
- Click on the “B” (Bold) icon above in the top of the editor field to make the characters bold in this top row’s heading text.
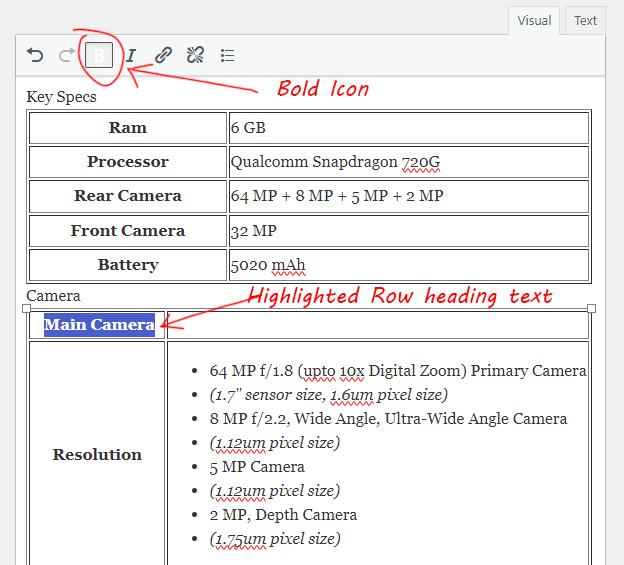
- Remove Table data of this row.
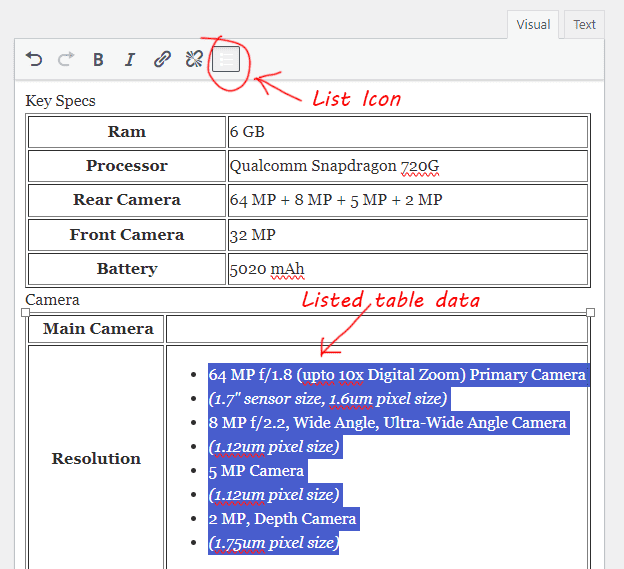
- Listing Table data:
- Click on or select the “Table data” text to be listed.
- Click on the “List” icon above in the top of the editor field to convert listing the “Table data”.
- Creating Muted Texts in the Listing:
- Click on or select a specific list line to make the text muted.
- Click on the “I” (Italic) icon above in the top of the editor field.

- Repeat this process for each additional section you want to add.
Publishing the Table: Click on the Publish button to save the table.
After a while, you will see a “Shortcode” generated field in the top right side of the page. Click on the “Copy Shortcode” button and paste the copied shortcode where you want to add it in posts and pages.

