You need to install & activate LYNX Add-ons plugin, since this is a part of the plugin !
jQuery tabs allow you to organize and present content in a tabbed format, providing a neat and user-friendly way to navigate through information. With LYNX Tabs, you can easily create jQuery tabs for your website.
Enable LYNX Tabs:
- Go to your WordPress dashboard and navigate to LYNX Add-ons Options.
- Enable the “LYNX Tabs” item.
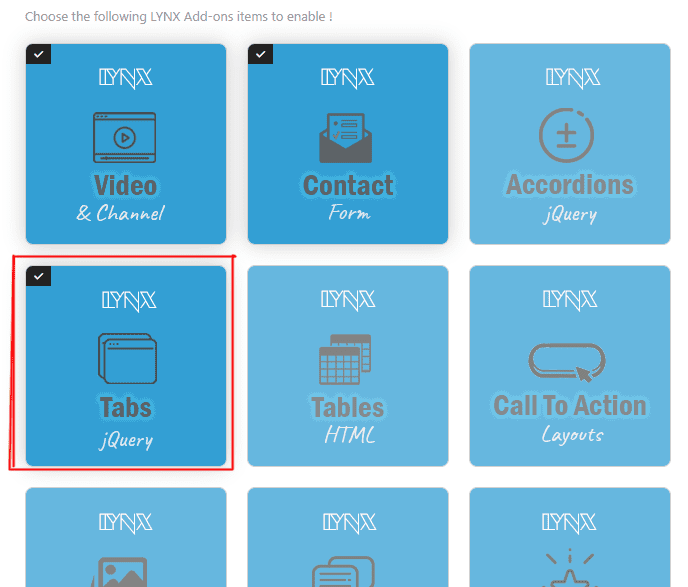
- Save the options and refresh the page.
Create New Tabs:
- Once enabled, you’ll see the “LYNX Tabs” menu item in the admin dashboard menu.
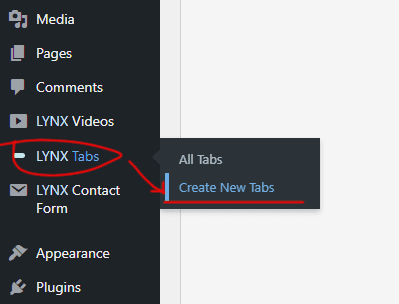
- Click on “Create New Tabs” submenu to open the creation page.
Add Tab Details:
- Add a title to identify your tabs.
- Choose the tabs style: Horizontal or Vertical.
- Select a template from the pre-built options with image previews.
Customize Tab Navigation:
Choose whether to include next/prev buttons for tab navigation.
Create Tabs:
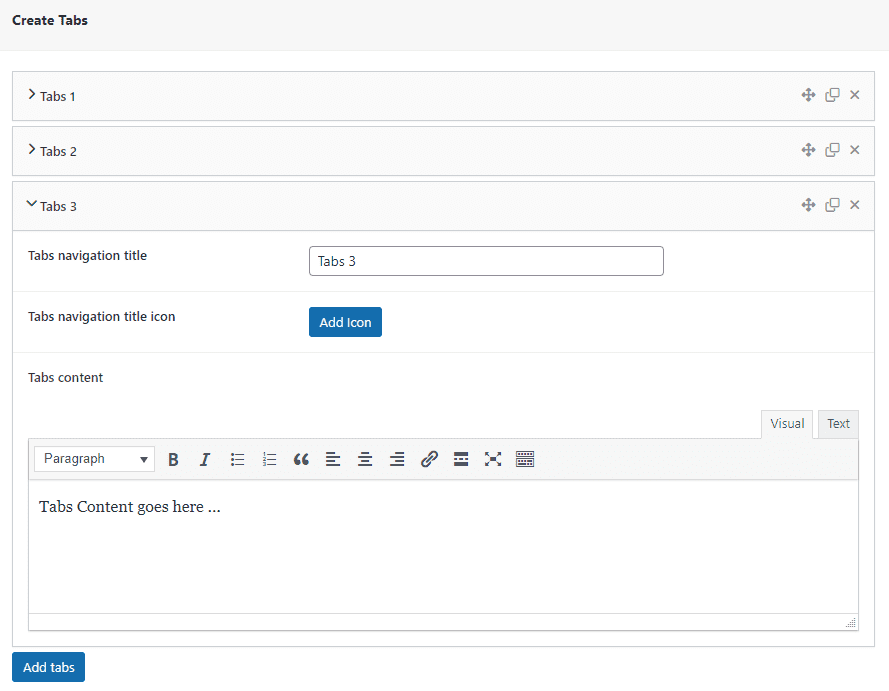
- Click on the “Add tabs” button to add a new tab.
- For each tab, set the navigation title, icon (optional), and content.
Publish the Tabs:
- Click “Publish” to save your tabs.
Insert the Tabs:
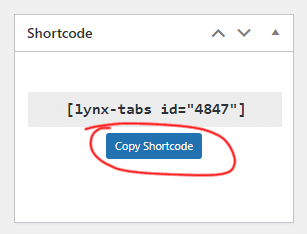
- After publishing, copy the shortcode provided above the publish button.
- Paste the shortcode into your posts or pages where you want to add the tabs.
Additional Options:
- You can also insert the tabs using the post editor block or in widget areas. Follow this documentation here for these methods.