Custom post types in WordPress allow you to define and create content types other than the default posts and pages. They enable you to organize and display different types of content on your website, such as products, events, portfolios, etc.
You need to install & activate LYNX Add-ons plugin, since this is a part of the plugin !
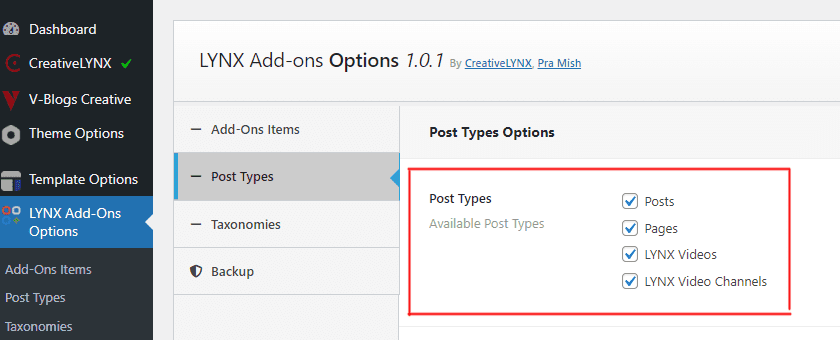
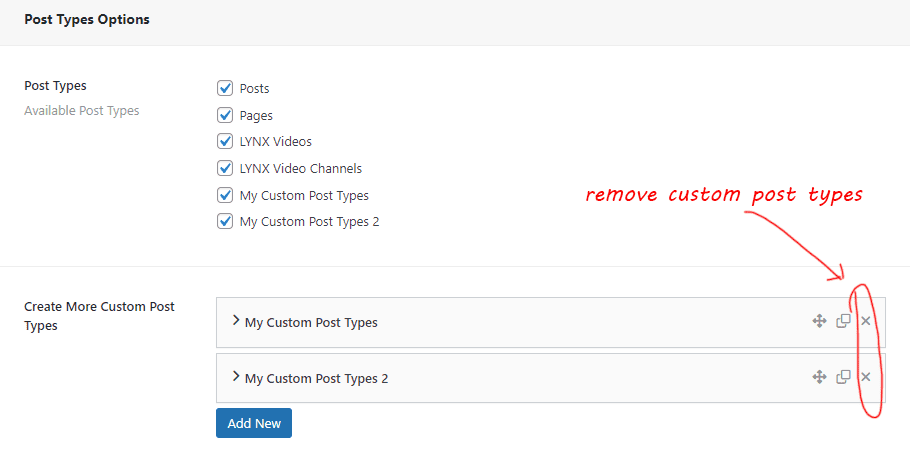
Available Post Types: You can see the the lists of available post types of your website.
Creating Custom Post Types
With the LYNX Add-ons plugin, you can easily create custom post types without any coding skills. Follow these steps:
- Click on the “Add New” button to create a new custom post type.

- Fill in the following fields:
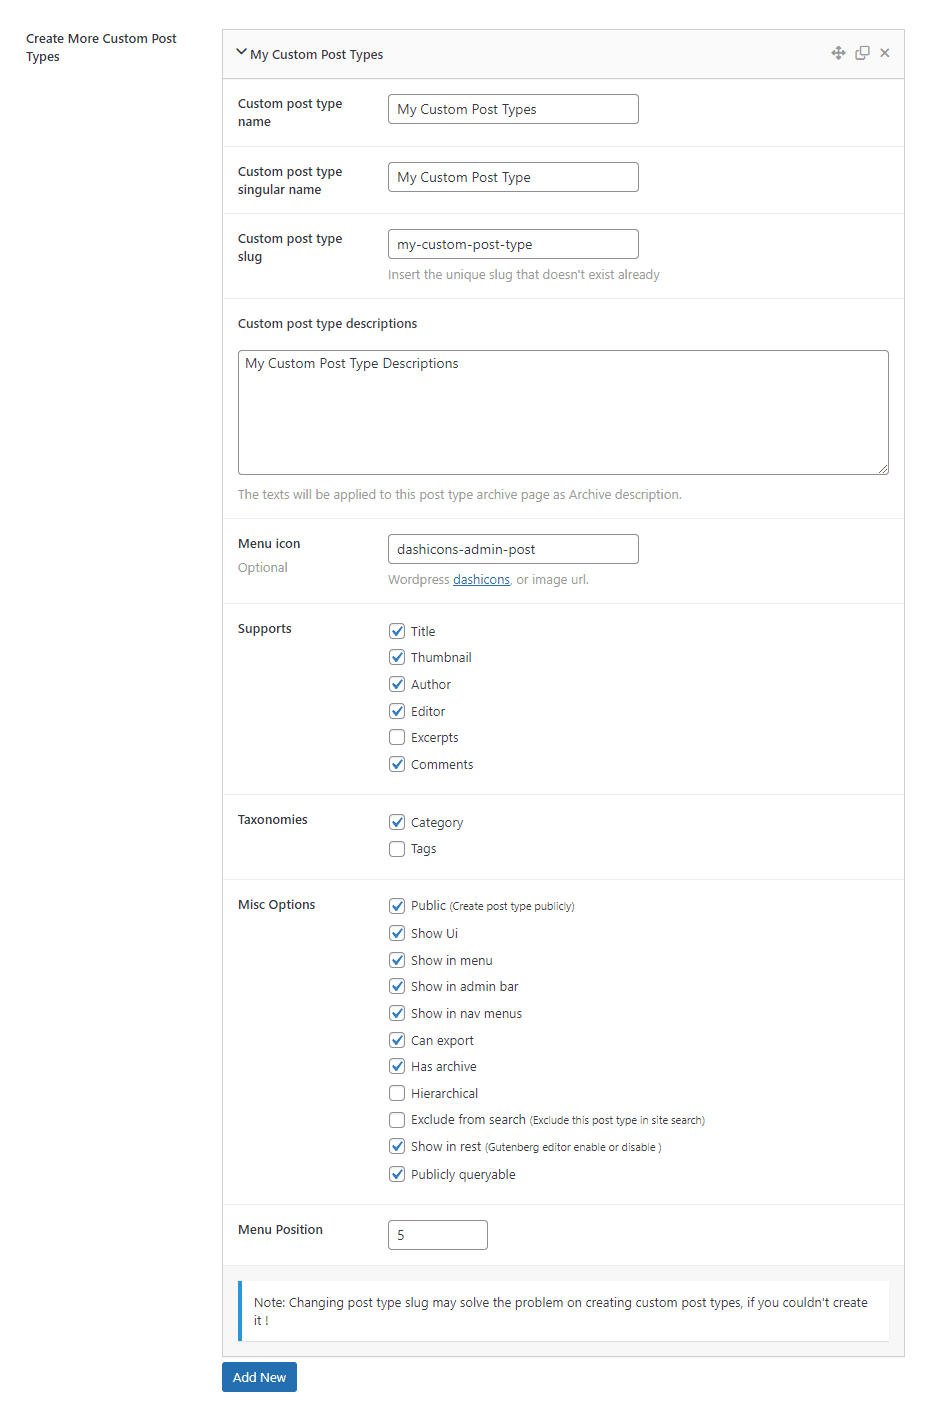
- Custom Post Type Name: Define the name of your custom post type.
- Custom Post Type Singular Name: Define the singular form of your custom post type name. (This is the singular form of your custom post type name. It’s used to refer to individual items of that post type, such as “Book” for a post type “Books.” It helps maintain clarity throughout your site’s interface.)
- Custom Post Type Slug: Define a unique slug for your custom post type.(The slug is a URL-friendly version of your custom post type name. It’s used in the URL to identify the type of content. For example, if your custom post type is “Books,” the slug could be “books.” Slugs should be lowercase and separated by hyphens for readability)
- Custom Post Type Descriptions: Add descriptions for your custom post type.(The description for your custom post type provides a brief overview or explanation of what the post type is about. This description is often displayed on the post type’s archive page, giving visitors more context about the content they are viewing. It’s a helpful tool for organizing and categorizing your content.)
- Menu Icon: Insert a menu icon for your custom post type.
- Supports: Check the items you want to enable the fields for your custom post type in post editor page (e.g., Title, Thumbnail, Author, Editor, Excerpts, Comments).
- Taxonomies: Check the default taxonomies to attach with your custom post type (e.g., Category, Tags, other available custom taxonomies).
- Misc Options: Check the additional options for your custom post type
- Public: (Determines whether the custom post type is intended to be Publicly Queryable. If it’s not checked, the post type will not be shown in the front end of the site.)
- Show UI: (Whether to generate a default UI for managing this post type in the admin.)
- Show in Menu: (Whether to show the post type in the admin menu.)
- Show in Admin Bar:(Whether to show the post type in the WordPress admin bar.)
- Show in Nav Menus: (Whether the post type is available for selection in navigation menus.)
- Can Export: (Whether to allow this post type to be exported.)
- Has Archive: (Enables post type archives. Will use post type as archive slug by default.)
- Hierarchical: (Whether the post type is hierarchical (e.g., page).)
- Exclude from Search: (Whether to exclude posts with this post type from front end search results.)
- Show in REST: (Whether to include the post type in the REST API. Set this to true for Gutenberg editor support. [Unchek it, if you don’t want to enable Gutenberg editor])
- Publicly Queryable: (Whether queries can be performed on the front end for the post type.)
- Menu Position: (The position in the menu order the post type should appear. To work, Show in Menu: must be checked.)
- Save your options and refresh the page. Your custom post type will now be available in the “Available Post Types” field above or in your dashboard menu as well.
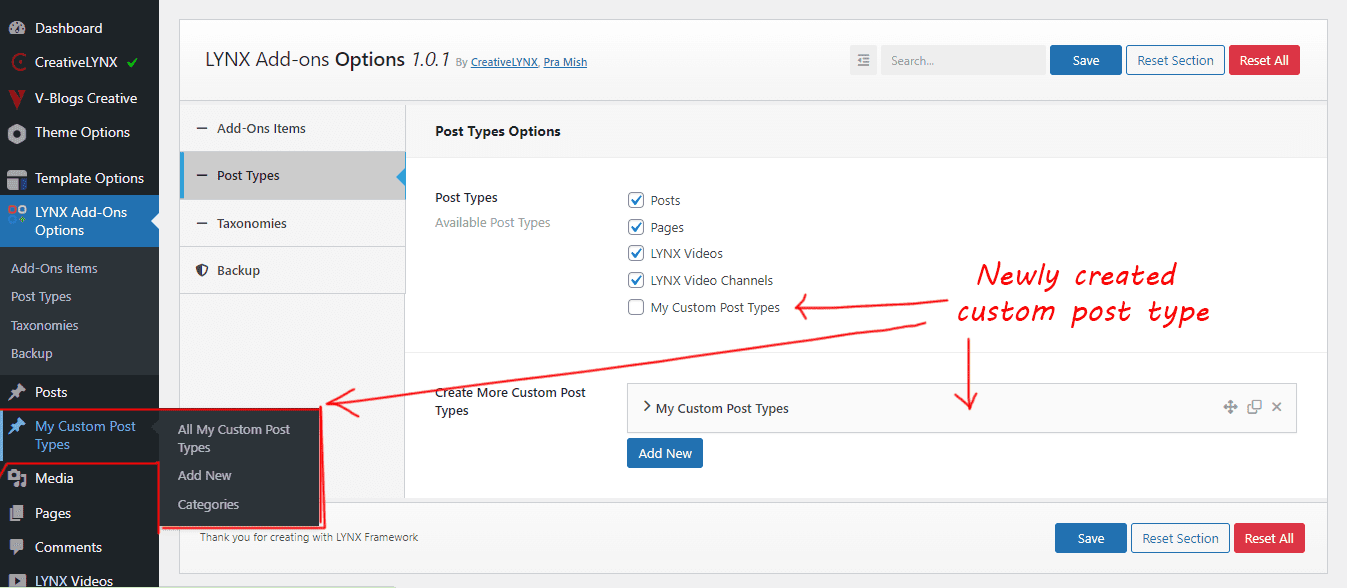
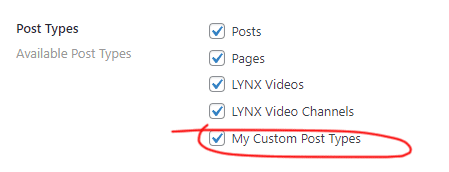
And, don’t forget to check newly created custom post type in the Available Post Types lists to enable all of options and tools to this post type !
Repeating this action you can create the unlimited numbers of custom post types.
Avoiding 404 error
Avoiding 404 errors in your custom post type’s post pages is crucial for a smooth user experience. Here’s how you can do it:
- Navigate to Settings-> Permalinks in your WordPress dashboard menu.
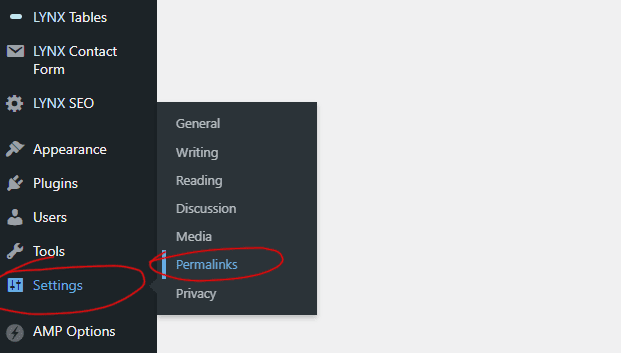
- The “Permalink Settings” page will open.
- Scroll down to the bottom of the page and click on the “Save Changes” button.
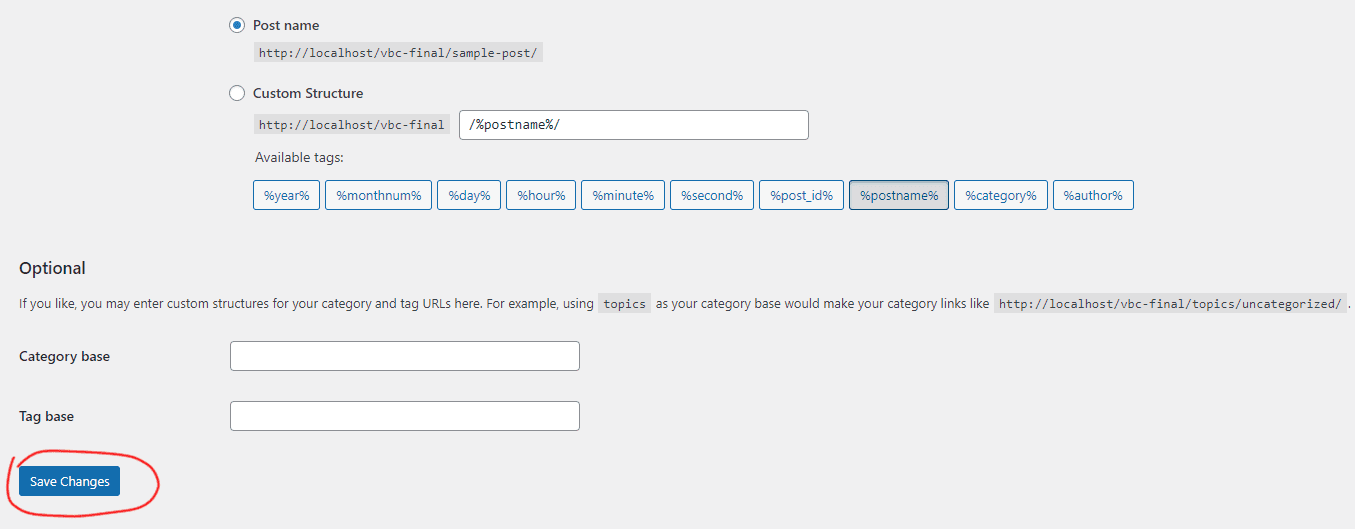
- This action refreshes your site’s permalinks and helps WordPress recognize the new custom post type, thus avoiding 404 errors.
After following these steps, your custom post type’s post pages should load correctly without any 404 errors.
Removing Custom Post Types
- Go to the LYNX Add-ons Options -> Post Types page in your WordPress dashboard.
- Locate the custom post type you want to remove.
- On the right side of the custom post type’s settings, you’ll see an “X” sign. Click on it.
- A confirmation dialog will appear asking if you’re sure you want to delete the custom post type. Confirm by clicking “OK.”
Please note that deleting a custom post type will may erase all data related to that post type, and this action is irreversible.