The Single Post-Page Section provides combined settings and options for the single and page templates, allowing you to customize the layout and appearance of individual blog posts and pages on your website.
Layout Section
When accessing the layouts page, you will find a screen option at the top where you can select either “Post” or “Page” options, which is Post is for Single Post and Page for Page.
Single Post – Layout Settings:
- Post Featured Section: Choose from eight prebuilt templates for the featured section of your posts, each with a template image preview.
- Post Featured Section Background: Select a gradient or plain color background for the featured section.
- Post Featured Section Layout: Choose between “full width” or “box” layout for the featured section.
- Post Featured Section Skin: Customize the skin of the featured section with options for “light,” “gray,” or “dark.”
- Post Featured Video: Determine how the featured video is displayed, with options for “PopUp/Lightbox,” “Inside featured section,” or “In the top of post content.”
- Post Featured Video Background: Enable or disable using the featured video instead of a featured image
- Post Container Width: Adjust the width of the post or page container to customize the overall layout.
- Post Sidebar Size: Choose between “default” or “mini” size for the sidebar of your posts.
Block Section
1. Post Header Block:
The post header block contains elements that are displayed inside the header section of a single post. Creating & Managing Post Header Block: The post header block’s field offers the following “block type” options to select from:
- Post title
- Post subtitle
- Post highlights
- Post info/meta
- Post category
- Social share buttons 1
- Social share buttons 2
- Featured Image/video
- Ads

These header elements can be added by clicking the “Add Block” button or removed by clicking the remove icon. They can also be rearranged in the desired order by dragging them.
2. Post Content Block:
The post content block includes elements that are part of the content section in a single post.
Creating & Managing Post Content Block:
- Block Type: There is only one “Post Content” option available as the block type to select in this block.
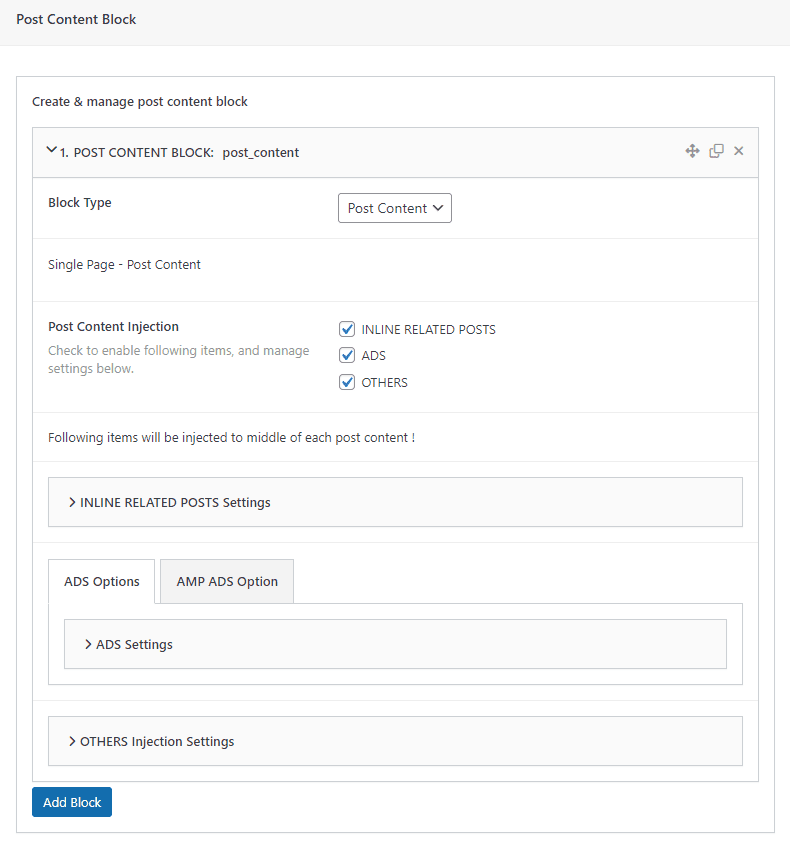
- Post Content Injection :
- Inline Related Posts
- Ads
- Others
- (These options can be enabled by checking the respective checkbox fields to inject them inside the single post content.)
- INLINE RELATED POSTS Settings:
- Related post: Choose one from “recent post,” category, tag, and author for related posts.
- Related post title: Enter a title for the related posts section.
- Related post limit: Set the maximum number of related posts to display.
- Templates: Choose from 5 prebuilt templates for the layout of related posts.
- Template Image Preview : View a preview of the selected template.
- Paragraph Count (X-number): Display inline related posts after a specified number of paragraphs.
- Ads Options: There are two ads options available:
- Ads Options: Ads settings for non AMP-Pages
- AMP Ads Options: Ads settings from AMP-Pages ( If AMP Plugin Install & Activated)
- Ads Select Options: You can select specific ads posts from the LYNX Ads custom post type.
- Other Custom Injection Settings:
- You can inject any content after a specific paragraph count into the post content using the WP-editor field.
3. Post Footer Block:
The post footer block appears after the post content and includes:
- Post Categories
- Post Tags
- Travel Destinations (if available)
- Social Share Buttons 1
- Social Share Buttons 2
- Ads
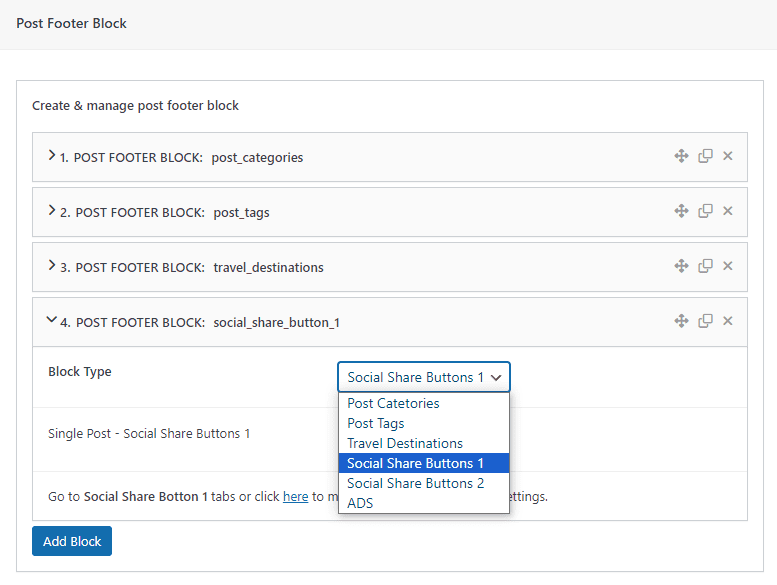
You can add or remove these elements using the “Add Block” button or by clicking the remove icon. You can also rearrange their positions by dragging them.
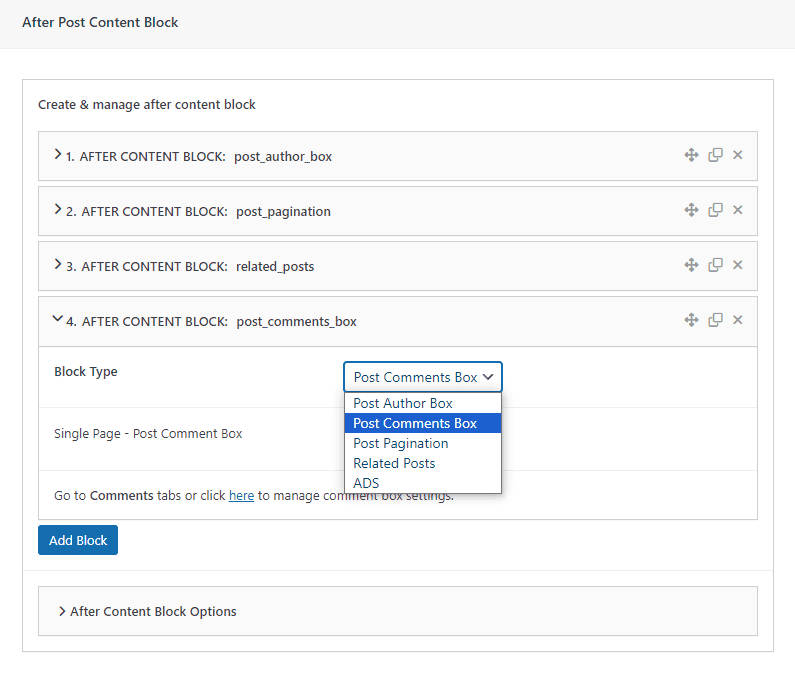
4. After Post Content Block:
The after post content block appears after the post footer block and includes:
- Post Author Box
- Post Comment Box
- Post Pagination
- Related Posts
- Ads
You can add or remove these elements using the “Add Block” button or by clicking the remove icon. You can also rearrange their positions by dragging them.
5.After Content Block Position:
The after content block position allows you to choose where the block appears in relation to the footer block and sidebar:
- If you select “After Post Content,” the block will appear after the post content and the footer block, excluding the sidebar (if enabled).
- If you select “After Post Content & Sidebar,” the block will appear after the post content, the footer block, and the sidebar.
Post Info Section
The post info/meta options include various fields for customizing how information is displayed:
- Style: Select between “Regular” or “New.” Note that the “New” style may not be applicable with certain post featured section templates.
- Design: Choose between displaying info with icons or without icons.
- Additional Info Items: Checkbox options to enable or disable additional info items, such as Author, Published Date, Read Time, Read Count, and Comment Count.
- Other Fields:
- Author Text: Customize the text that displays before the author’s name (e.g., “Posted by Admin“).
- Date Text: Customize the text that displays before the published date (e.g., “Published on 2024-02-06“).
- Date Ago Format: Choose the date format for displaying how long ago the post was published (e.g., “1 hour ago,” “1 month ago“).
- Comment Text: Customize the text that displays after the comment count (e.g., “25 Comments“).
- Read Time (Words per Minute): Set the estimated read time based on words read per minute.
- Separators: Choose a separator style to separate post info items (e.g., Dot, Slash, Dash).
Social Share Section
The social share options allow you to customize how social share buttons are displayed:
- Layouts: Choose between two layouts of social share buttons:
- Social share button 1
- Social share button 2
- Enable/Disable: Check the boxes to enable or disable specific social share buttons, such as:
- Tumblr
Author Box Section
The Author Box offers the following customization options:
- Templates: Choose from five pre-built templates for the author box, each with a template image preview.
- Author Box Post Title: Add a title for the author box.
- Author Box Post Limit: Set a limit for the number of author posts displayed in the author box.
- Ajax Post Loading: Enable or disable ajax post loading for the author box.
Post Pagination Section
Customize the appearance of post pagination with the following options:
- Pagination Layouts: Choose between Classic layout or Modern layout for the pagination.
- Post Thumbnail: Enable or disable the display of post thumbnails in the pagination.
- Thumbnail Style: Choose between square shape or round shape for the post thumbnails.
- Next Button Label: Set the label for the next button.
- Prev Button Label: Set the label for the previous button.
Related Posts Section
The Related Posts section is placed in the “After Post Content Block” of a single page. It provides users with easier navigation to other related content on your website.
The settings for this section are user-friendly. For more detailed information, you can refer to the “Archive Page Section” documentation.
Comments Section
The Post Comments section allows you to choose from three pre-built layouts, each with an image preview, to display your preferred comment layout.
ADS Section
To enable Ads Settings, you need to install and activate the “LYNX Add-ons” plugin, enable “LYNX ADS,” and enable it on its setting page. After creating the ADS Posts, you can select the existing ADS for the field.
After Page Header: This ads will be displayed at the top of your content and after the page header of your website.
Before Page Footer: This ads will be displayed at the bottom of your page content and before the page footer of your website.
Inside the fields: You can choose the ADS, select the ADS display, options like “Desktop & Mobile,” “Desktop only,” or “Mobile only,” and choose the Ads position as “Left,” “Center,” or “Right.”
For more details visit ADS documentations here.
Override Section
Single Post-Page Overriding Settings allow you to display override settings on the single post/page editor screen, enabling you to create unique and distinct layouts for each post or page.
Note: Enabling this option may increase the size of your database, but it offers the benefit of creating unique layouts for each post or page.
To enable the Override setting on the single post’s editor screen, follow these steps:
- Post Overrides: Toggle the button ON to enable it.
- Post Override Options:
- Enable for all posts: This option enables the overriding setting for all post editor screens.
- Enable only on specific posts: This option enables the overriding settings only on specified posts (listed below in the field). You can use this option to enable the setting for specific posts where you want to create unique layouts. (This may help reduce the size of your database.)
- Select specific posts: After choosing “Enable only on specific posts,” use this field to select the specific posts where you want to enable overriding settings. Type the post title in the field and select the posts that appear in the dropdown.
- Clean Post Overrides Data: Check this field to enable it. (This action will delete all post overridden data after disabling or changing the override options above. However, it will help reduce unnecessary data in your database.)
After setting up these options, you will see the overriding options enabled in the single post/page editor, similar to the image below.
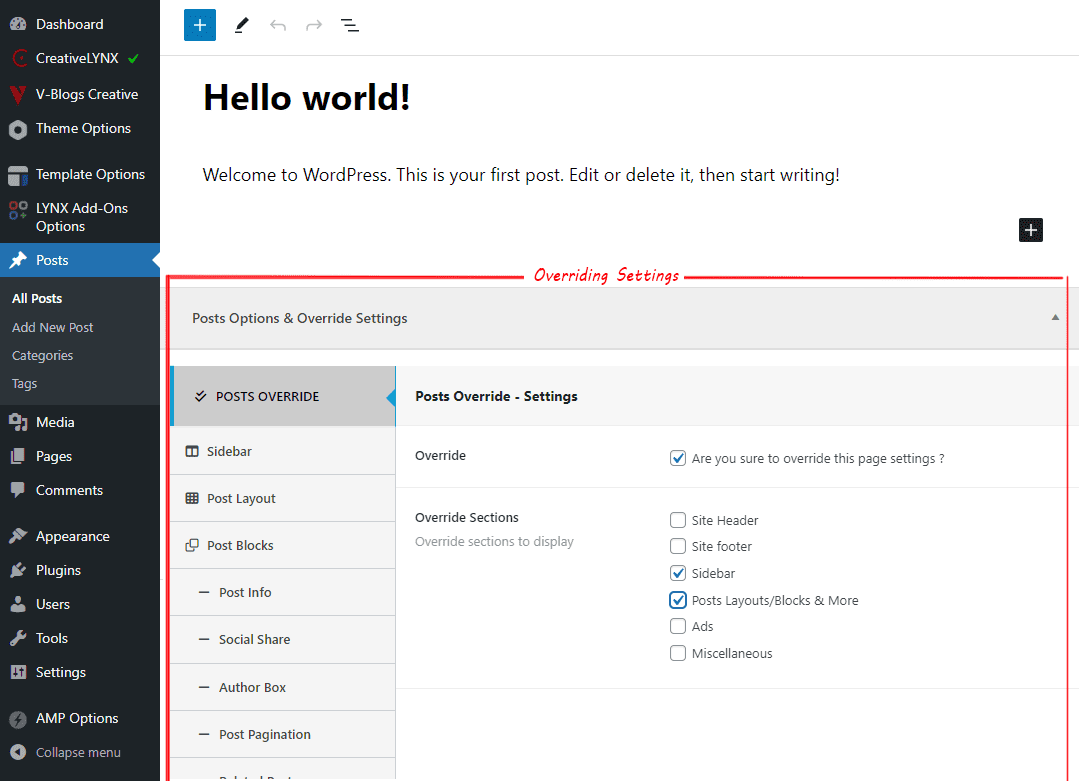
To confirm the override, check the field “Override: Are you sure to override this page settings?” This allows you to start new customization and setup for your current post’s settings and layout.
If you prefer not to use the overriding settings and keep regular settings from “Template Options,” you can un-check the field “Override: Are you sure to override this page settings?” This will prevent the overriding settings from being applied.